Authentication
How To Add Authentication?
In the digital world, customer verification, legal compliance, and information collection are imperative. Authentication settings fulfill these roles by guaranteeing security, ensuring legal adherence, and obtaining essential user information. They contribute to making your platform secure, compliant, and user-friendly simultaneously.
How to access the Authentication Page
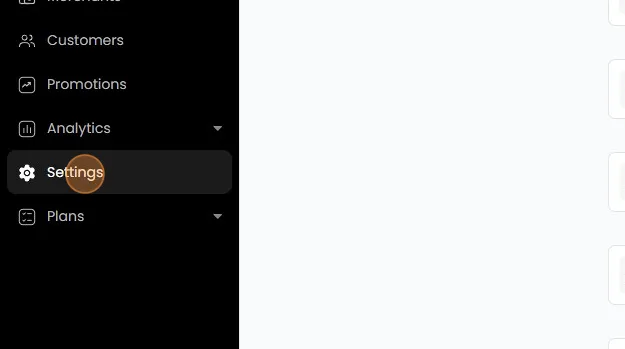
- On the Admin panel, click on "Settings."
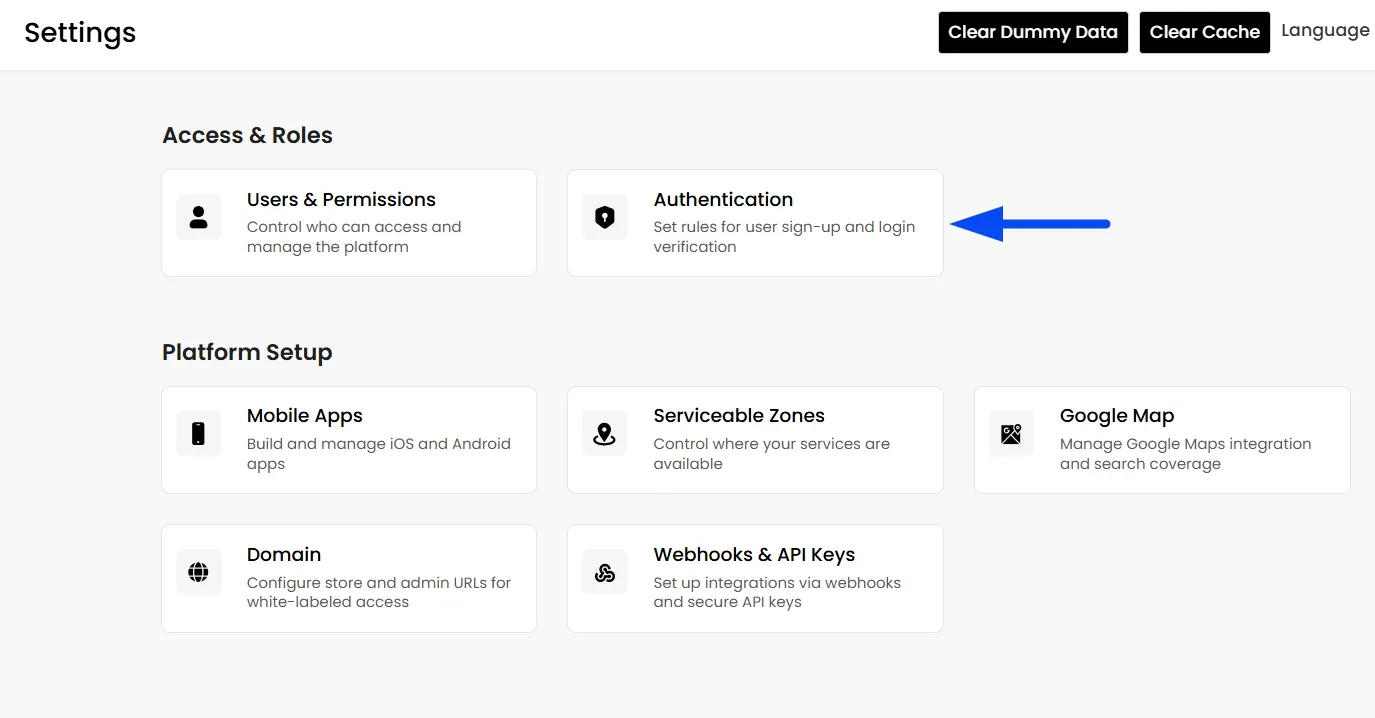
- Then click on the "Authentication" section
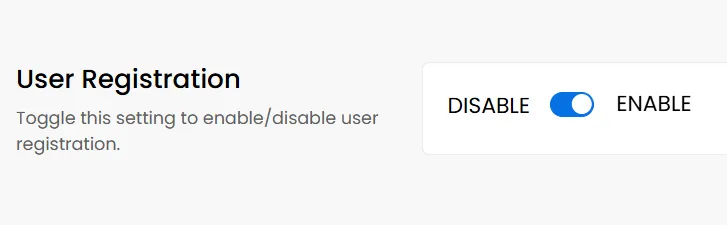
User Registration
The User Registration setting controls whether new users are allowed to create accounts on your platform. When enabled, your platform becomes open for new customer onboarding. When disabled, no new accounts can be created.
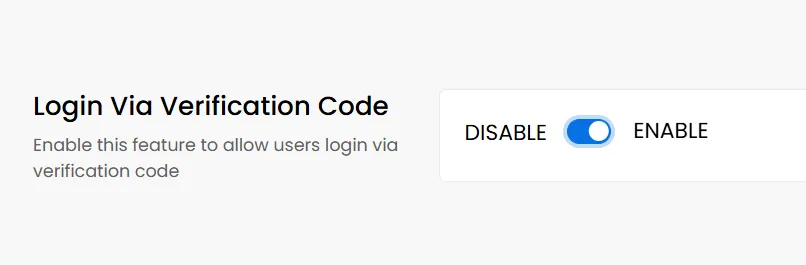
Login via OTP
Make logging in extra safe by letting customers use a one-time verification code sent to their phone or email. It's like an extra secret handshake to make sure it's really them.
Note: Configure Email and SMS service accounts from the Notification settings to use this feature.
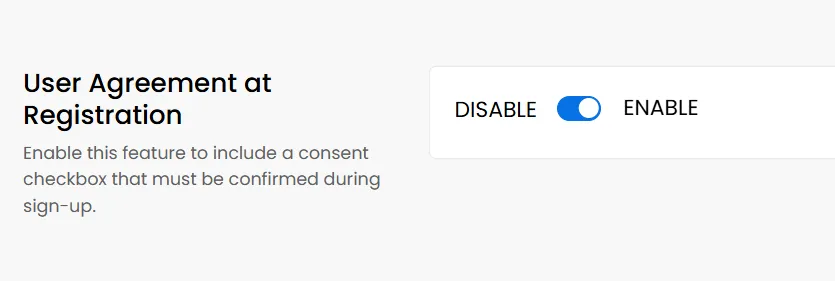
User Agreement at Registration
Add a checkbox when customers sign up to agree to the platform's terms and conditions. It's like asking, "Hey, do you agree to abide by the platform's rules?" before granting access.
Note: You can customize the consent text displayed during registration. To modify it, navigate to Admin Panel > Language Settings > Signup Fields, update the wording as required, and save your changes.
User Register Custom Fields
Get the info you need during sign-up by adding extra fields. It's like customizing a form so you can learn more about the customers joining your platform.
- You can enable or disable these additional fields from customer sign-up anytime.
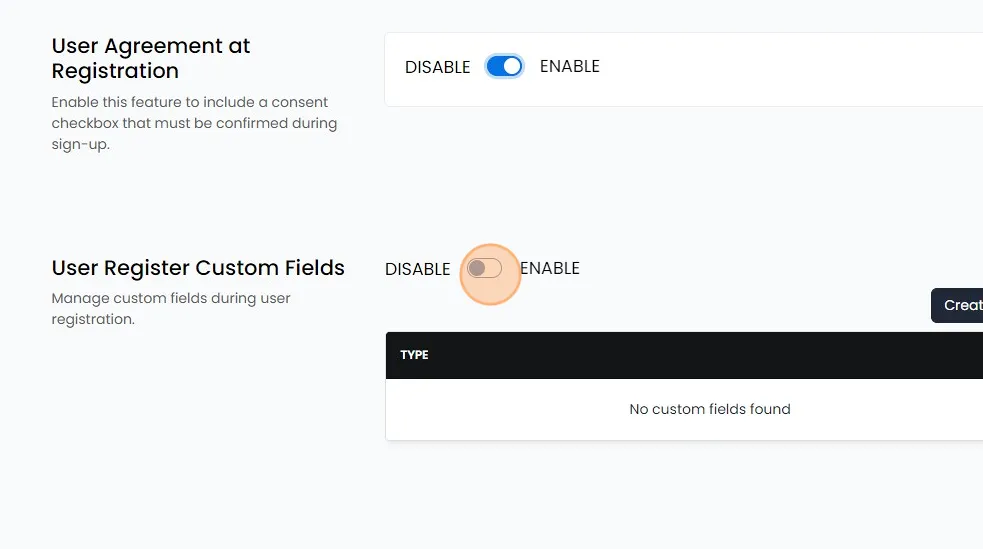
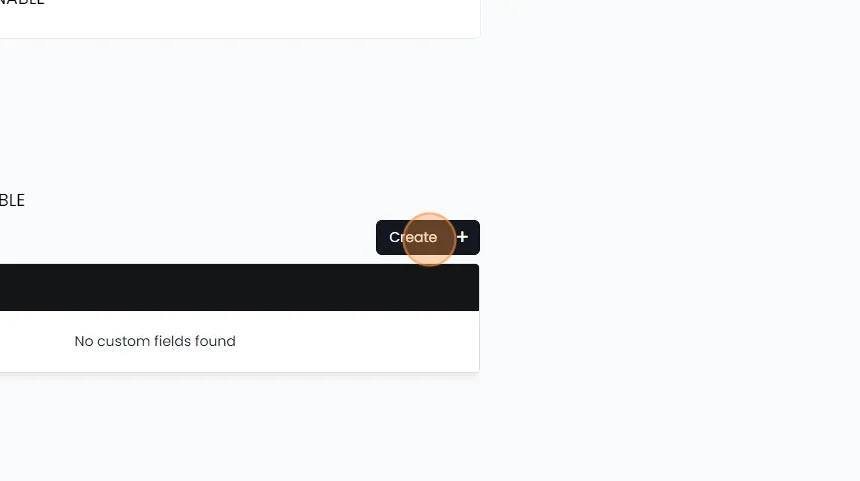
How to create a custom registration Field
- To create a custom registration field, click the “Create” button.
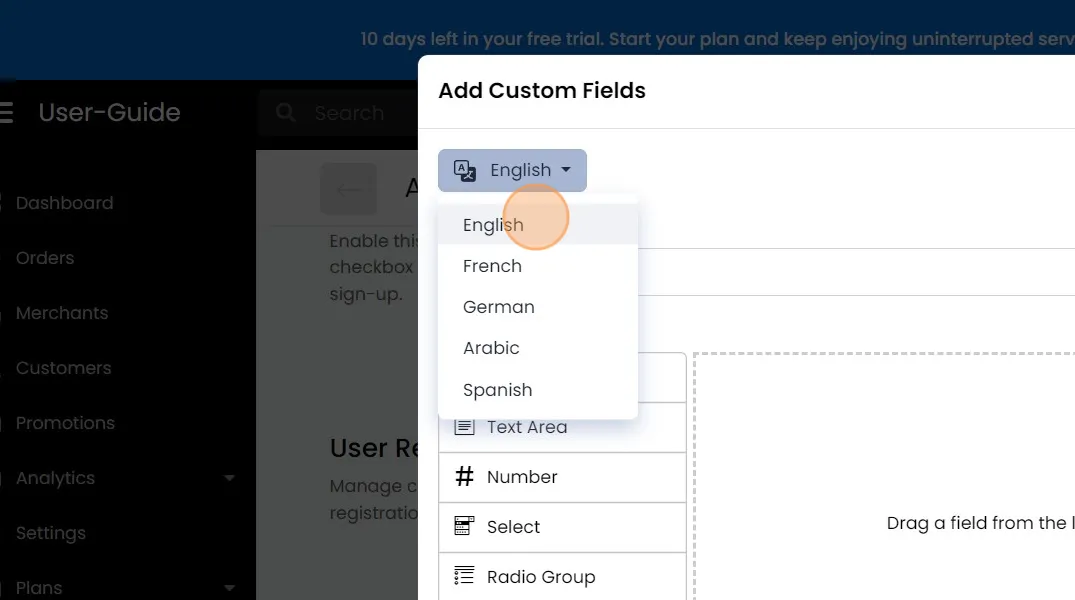
Language Selection
- "Select Preferred Languages" to tailor this information to customer choices.
Select the Field You Want to Add
- Drag and drop the type of field
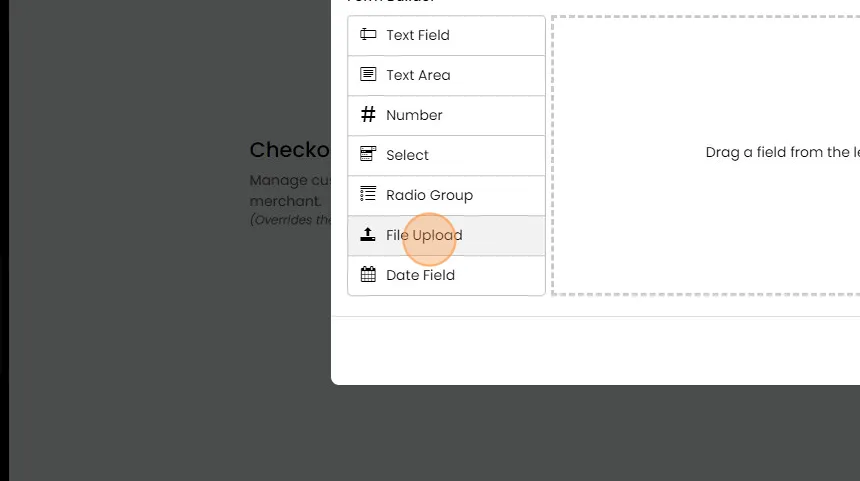
Configure Field Settings
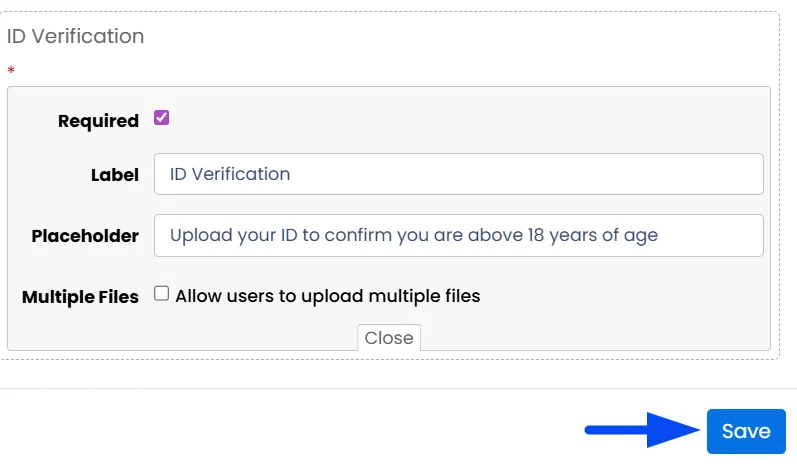
- Required: Whether it should be mandatory for customers to fill in during checkout
- Label: Heading of the field
- Placeholder: Any note added under the heading
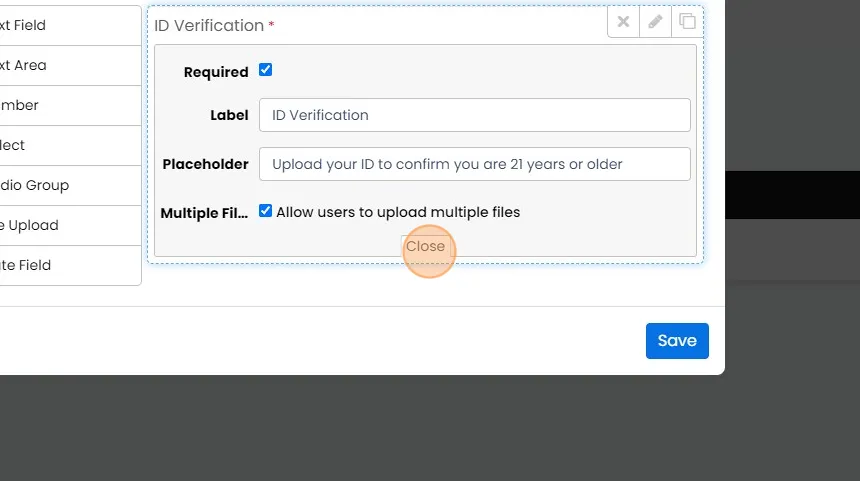
- Similarly, you can add more fields and click "Save".
Now your Authentication settings are successfully configured.
Google reCAPTCHA
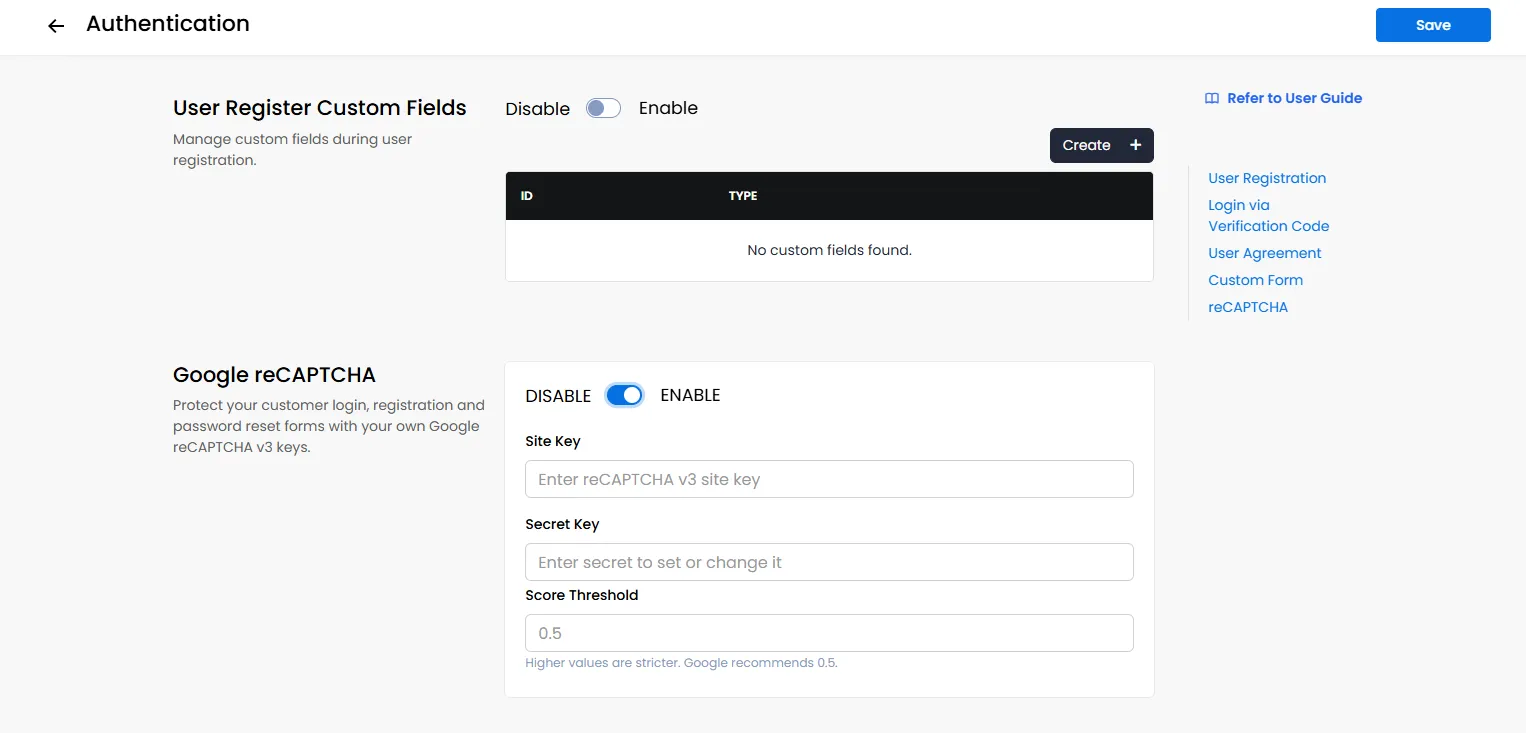
Google reCAPTCHA v3 helps protect your store from automated and potentially malicious activity by distinguishing genuine customers from bots. It can be used to protect customer login, registration, and password reset, helping reduce fake or bot-generated account registrations.
Note: Genuine customer registrations are a normal part of the customer journey, and Hyperzod does not control who chooses to register on your store. Google reCAPTCHA v3 is intended to help prevent automated or malicious sign-ups.
How to Enable Google reCAPTCHA
To configure Google reCAPTCHA v3:
- From the Admin panel, go to Settings > Authentication.
- Locate Google reCAPTCHA and enable the toggle.
- Enter your Site Key and Secret Key.
- Set the Score Threshold according to your requirements and save the configuration.
How to Get Your reCAPTCHA Keys
- Go to the Google reCAPTCHA Admin Console and sign in with your Google account.
- Select the reCAPTCHA type you want to use (such as reCAPTCHA v3)
- Add your website's Domain name (without http:// or paths, like example.com).
- Accept the terms of service and click Submit.
- Copy your newly generated Site Key and Secret Key
Merchant Auth
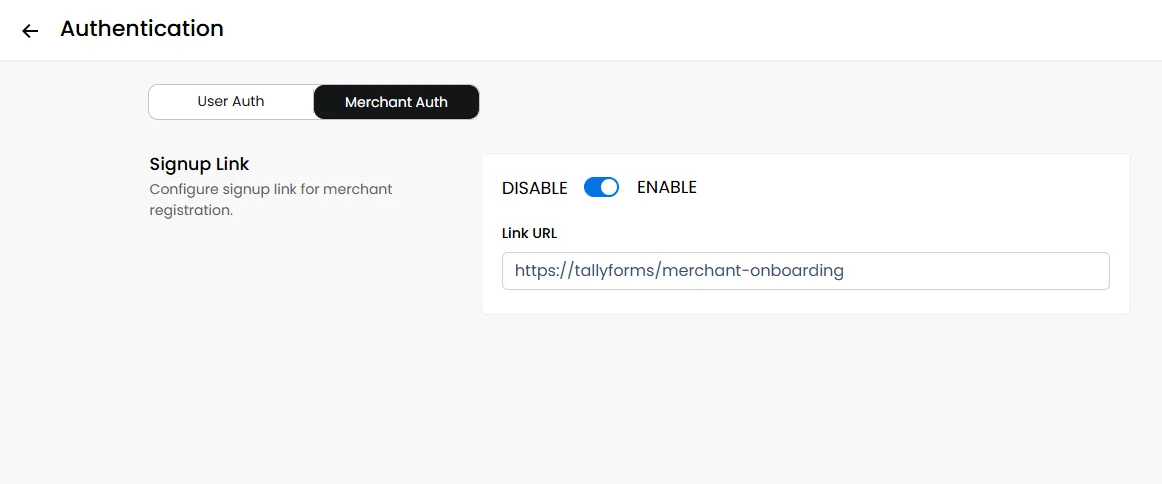
The Merchant Signup Link feature allows you to add a custom URL that merchants can access directly from the Merchant App. This can be used to provide merchants with an external registration form, onboarding form, application page, or any other third-party resource.
For example, you can add a third-party merchant signup form where new merchants can:
- Register their business
- Submit their merchant details
- Provide required documentation
- Complete the onboarding process
- Access any other information required before joining the platform
How to configure Merchant Auth
- Go to Admin Panel > Settings > Authentication.
- Select the Merchant Auth tab.
- Locate Signup Link.
- Enable the Signup Link toggle.
- Add the required URL and save the configuration.
Frequently Asked Questions (FAQs)