Dashboard
How To Use the Orders Management Dashboard?
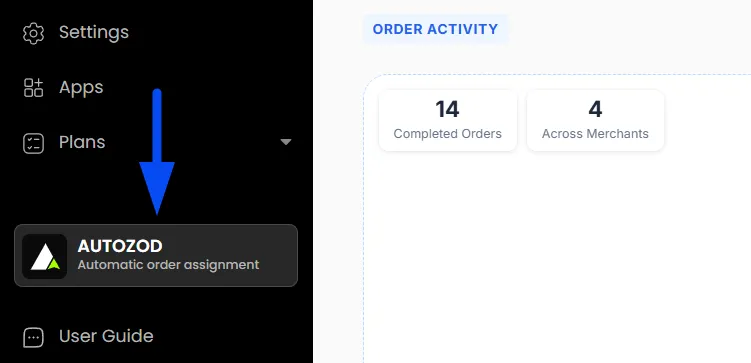
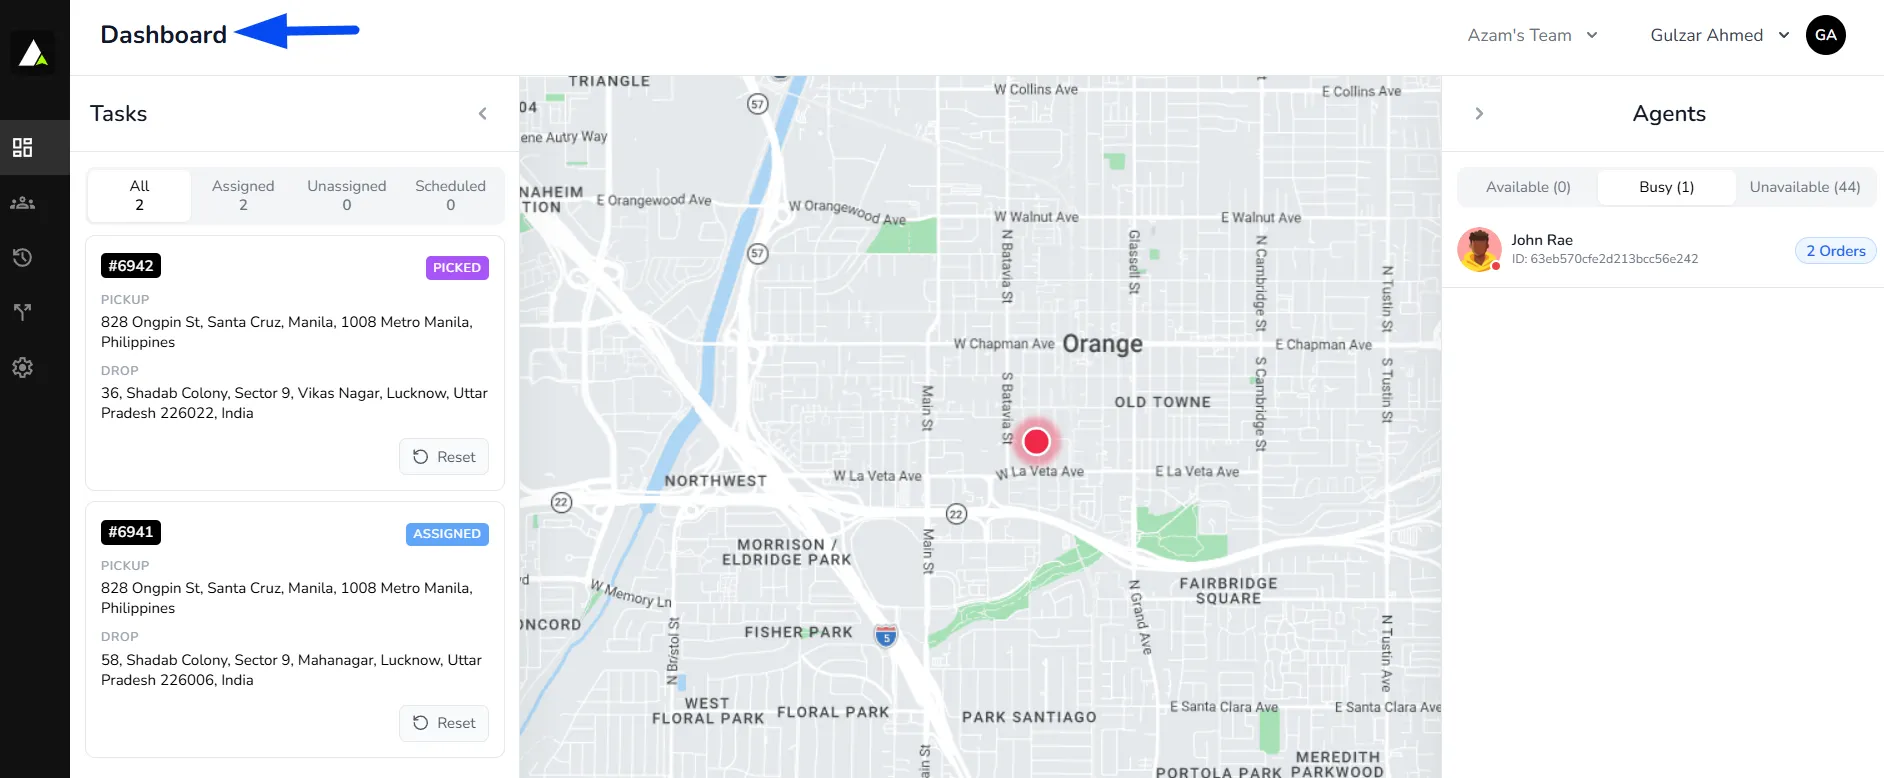
Upon auto-logging in to Autozod from your Admin panel, you will see the Autozod Order Dashboard.
This is your central hub for managing all orders.
Tasks
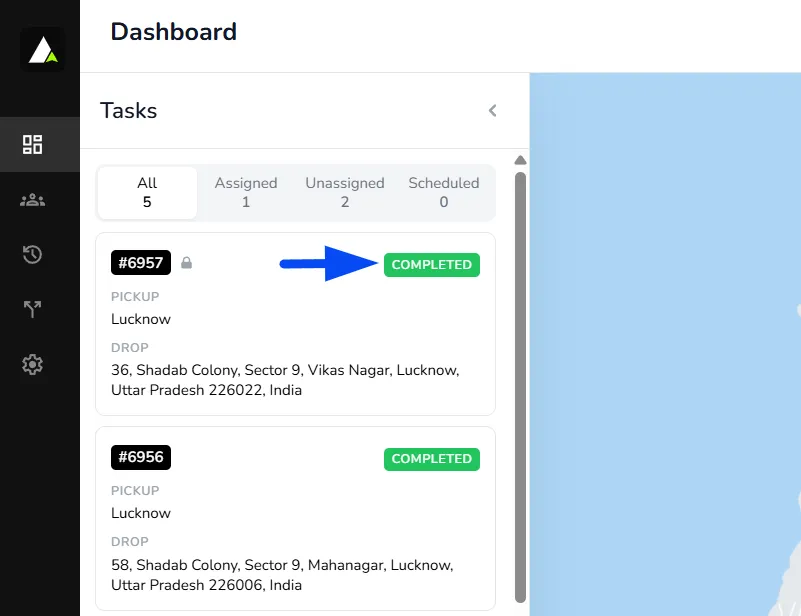
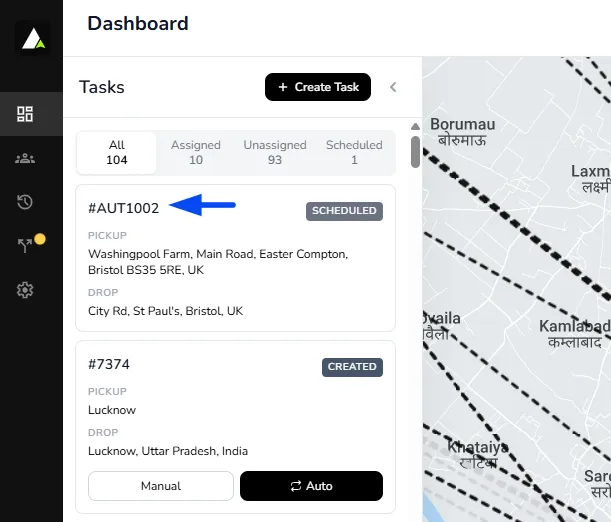
On the left side of the Autozod dashboard, you'll find the Tasks section, which allows you to filter orders based on their assignment status.
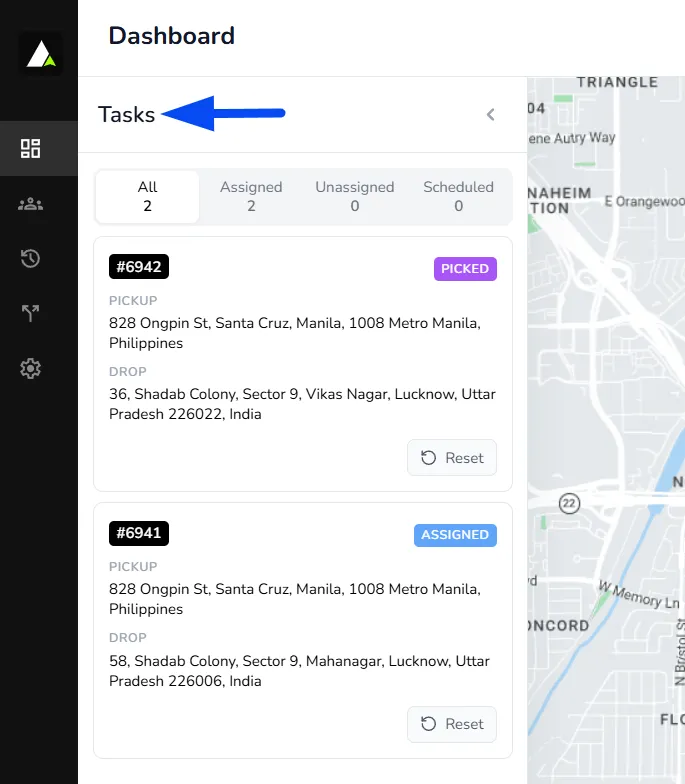
All
This tab displays all orders currently in the system, regardless of whether they have been assigned to a rider.
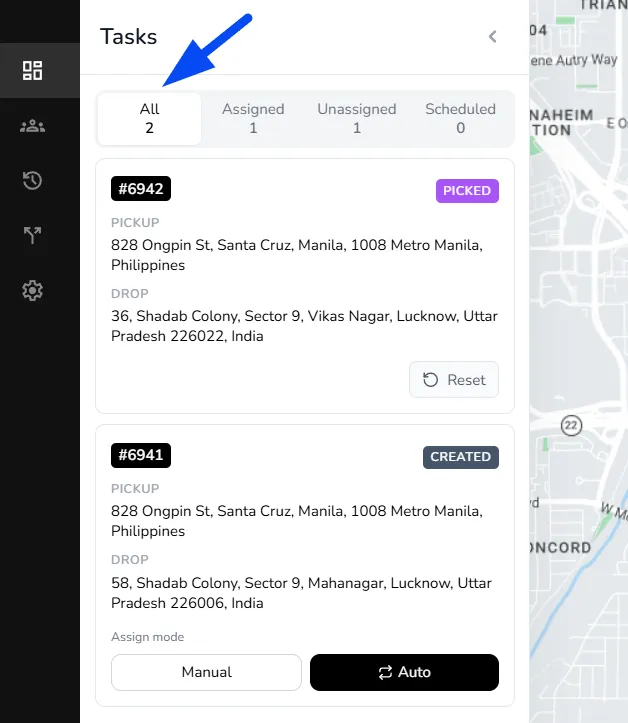
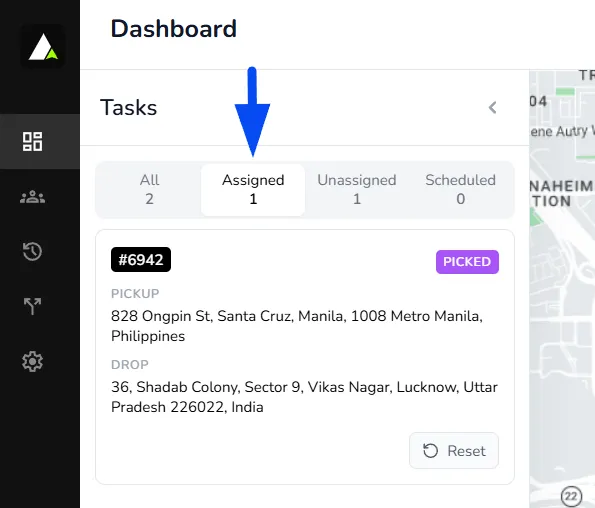
Assigned
Selecting this tab filters orders to show only those assigned to a rider for delivery.
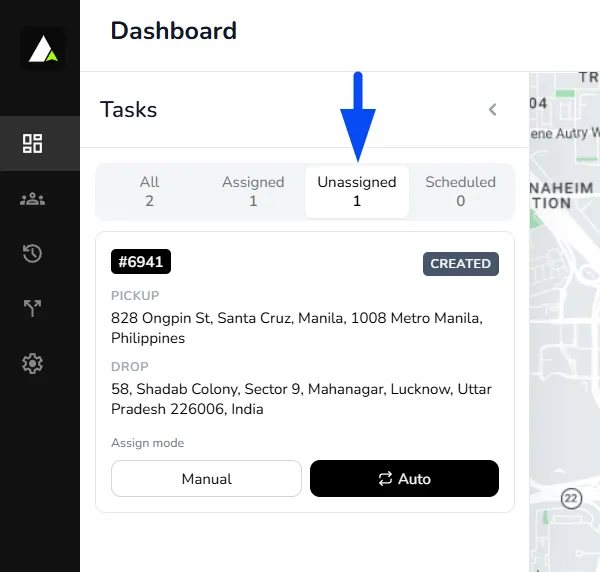
Unassigned
Here, you'll find orders that have not yet been assigned to any rider. These are tasks waiting for allocation.
Scheduled
The Scheduled section shows orders planned for a future time. These orders are pushed to the Autozod panel based on the configured wake-up time.
For example, if an order is scheduled between 5:00 and 6:00 PM and the wake-up time is set to 1 hour, the system first calculates the midpoint (5:30 PM). Based on the wake-up time, the order will move to the “All Tasks” section at 4:30 PM, after which the system will begin assigning a rider.
You can configure the Wakeup time by navigating to the Dispatch Builder within the Autozod panel and accordingly defining the time.
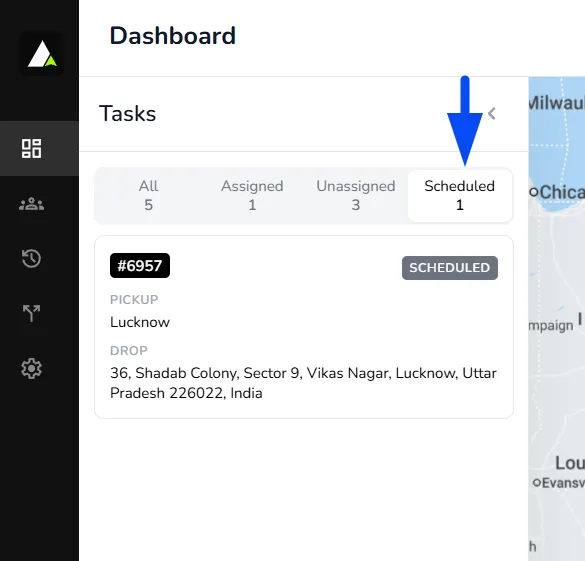
Tip: You can collapse the Tasks panel by clicking the arrow icon. This will hide the panel and give you a wider, clearer view of the map for better visibility and tracking.
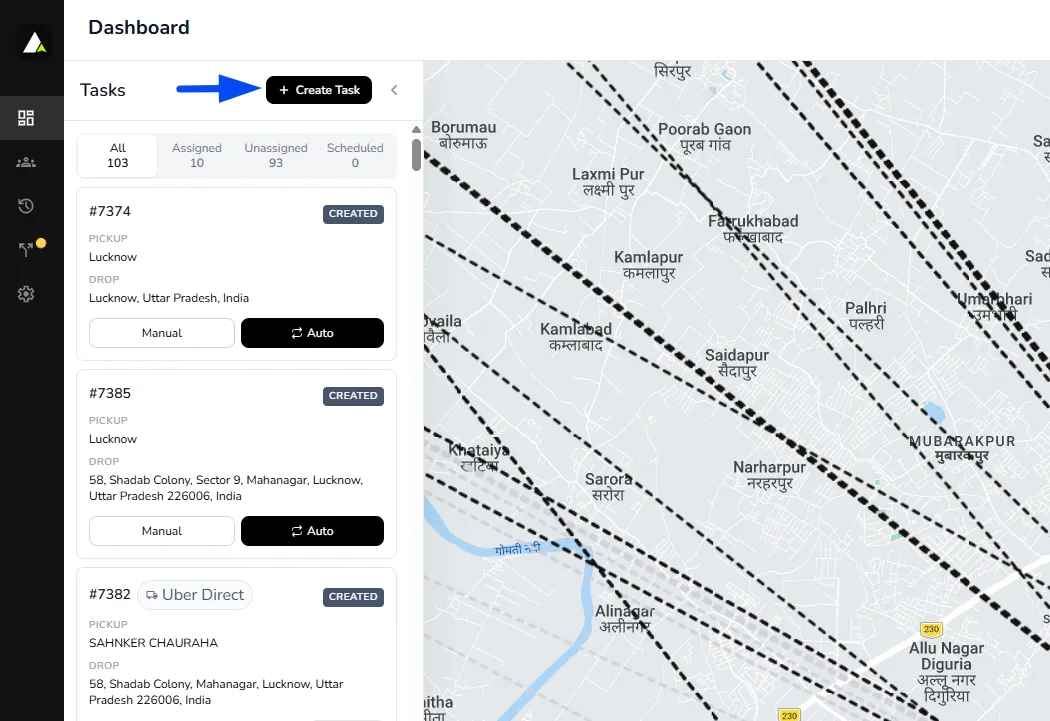
The Manual Task Creation feature allows admins to create delivery tasks directly from the Autozod Dashboard without requiring an order to be placed through the ordering platform.
This is particularly useful for businesses that need to assign deliveries outside of the normal order flow, such as internal deliveries or any other custom logistics requirement.
Once a task is created, it can be assigned manually to a preferred rider or automatically dispatched using Autozod's assignment algorithm.
Creating a Manual Task on Autozod
From the Autozod Dashboard, click Create Task.
A task creation window will appear where you can enter all the necessary delivery information.
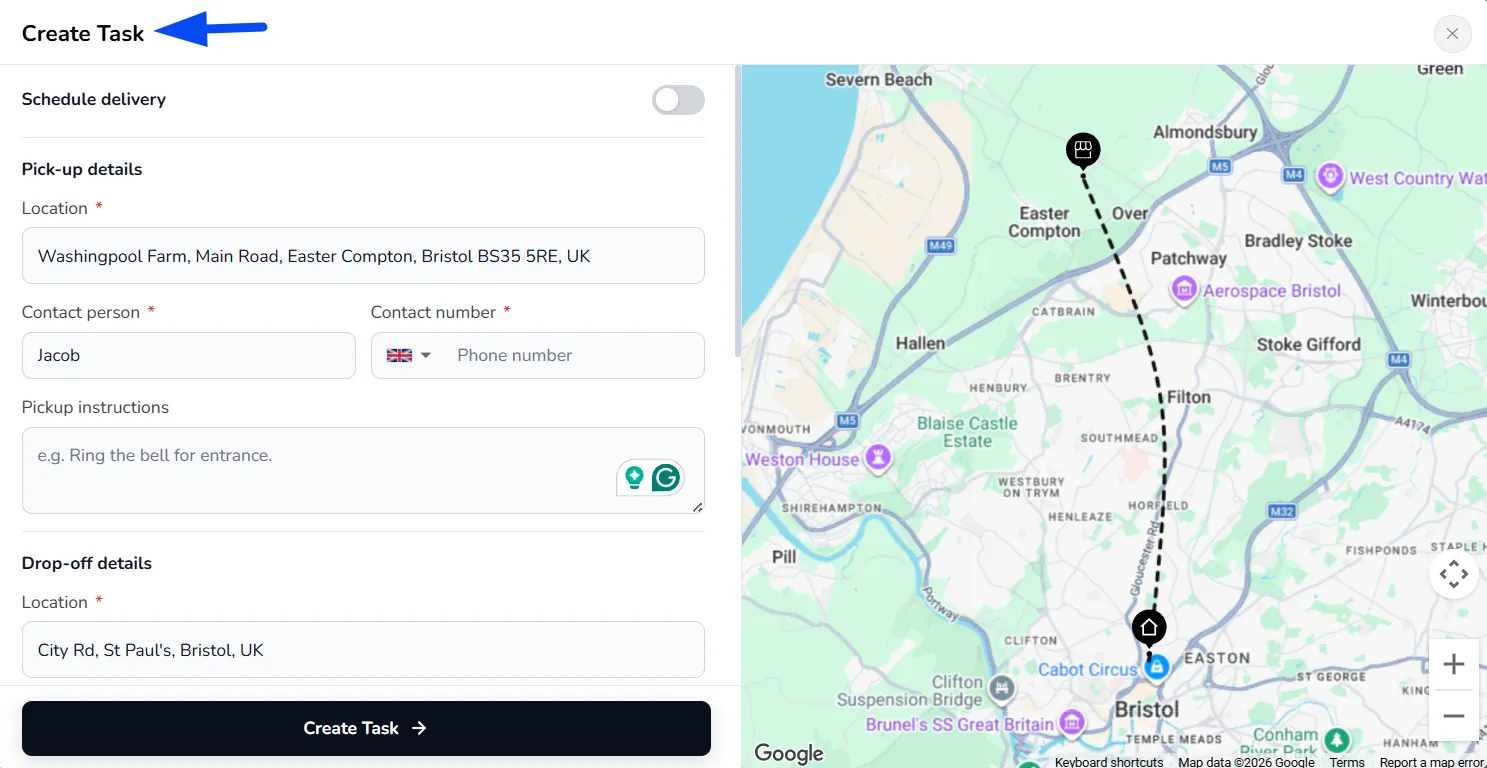
Task Details & Delivery Information
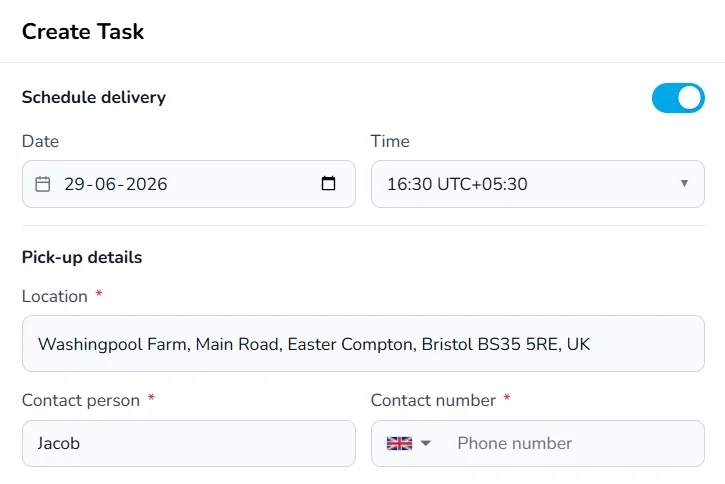
After opening the Create Task window, you can provide all the necessary information required to complete the delivery. This includes the pickup location, drop-off destination, contact details for both pickup and drop-off points, delivery instructions, and the items being delivered.
You can also specify the item quantity, individual item value, and the Total Task Value, giving the assigned rider complete visibility into what needs to be delivered.
Task Scheduling
If required, you can enable Schedule Delivery to create a task for a future date and time instead of dispatching it immediately. This allows businesses to plan deliveries in advance.
Completing Task Creation
Once all required information has been entered, click Create Task. The task will immediately appear in the Autozod Dashboard and can be dispatched to a rider.
Depending on your workflow, you can:
- Manually assign the order to a preferred rider.
- Allow Auto Assignment to automatically allocate the most suitable available rider
Agent Status
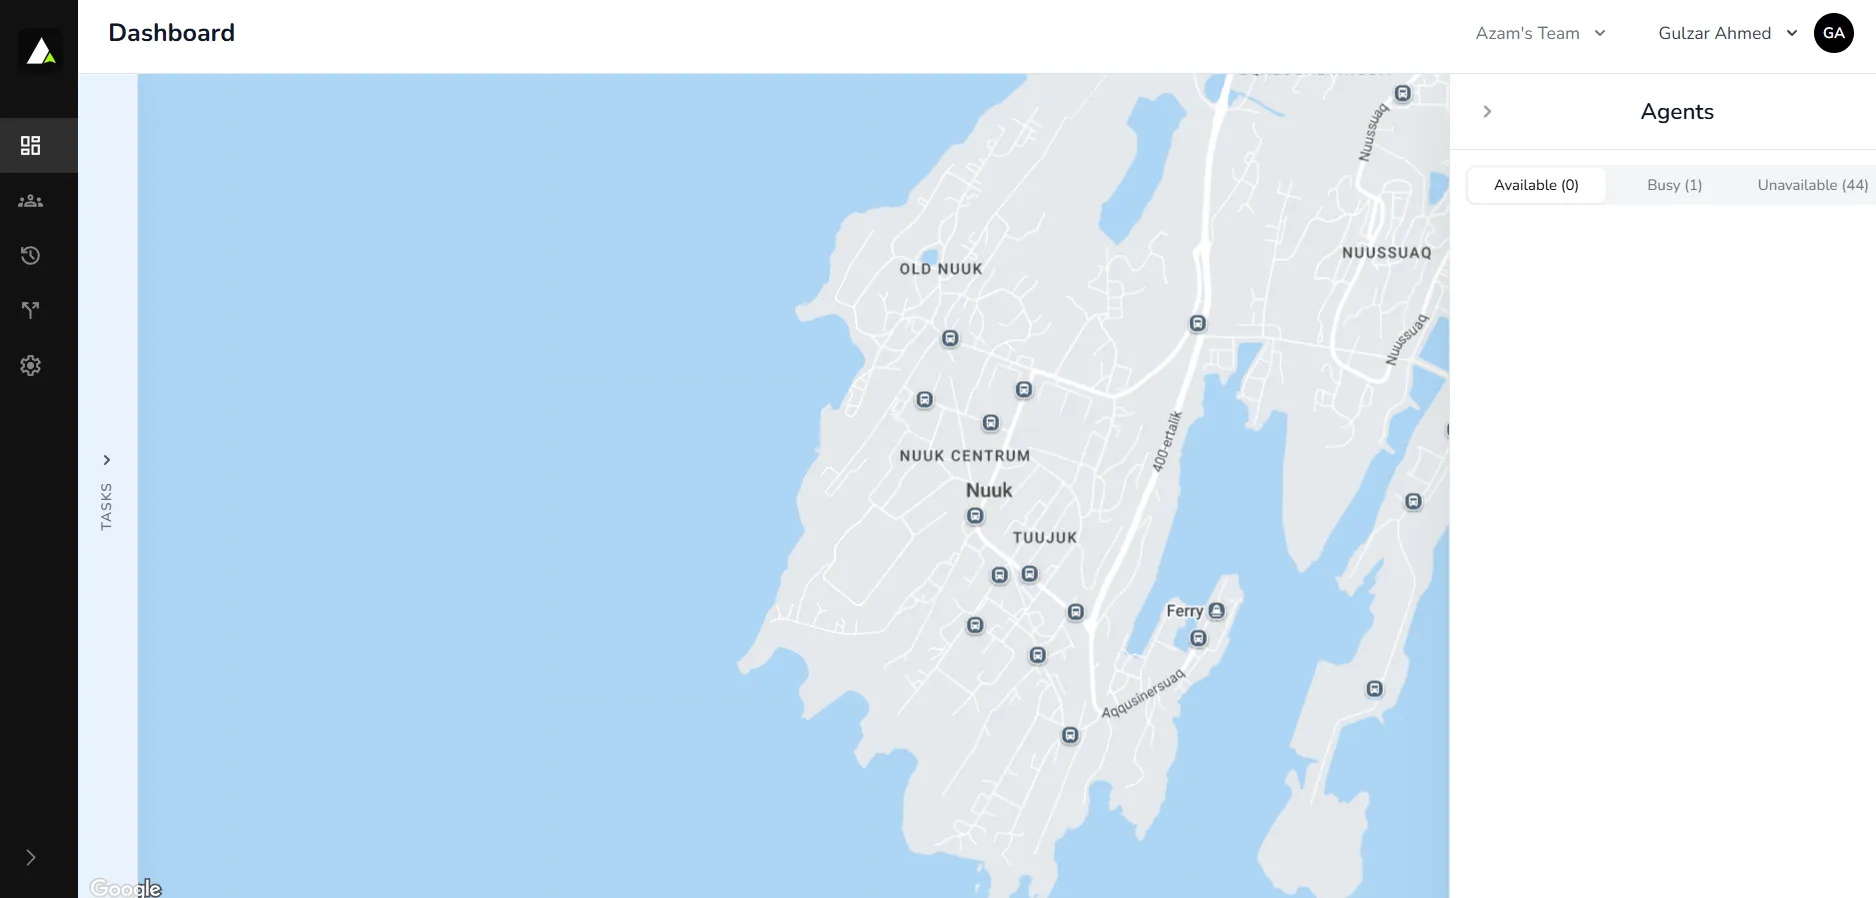
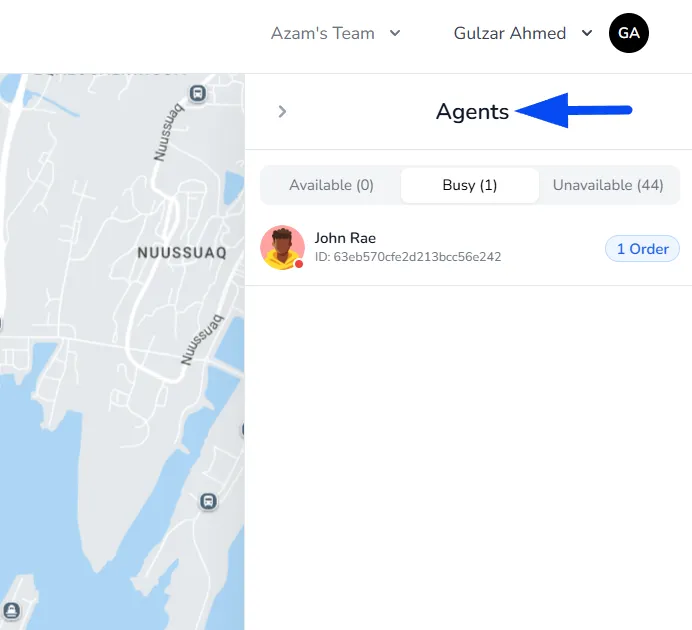
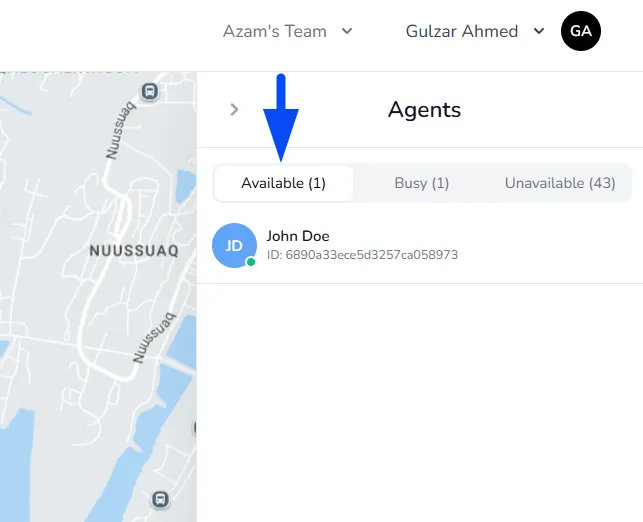
On the right side of the dashboard, you'll find the Agents section, providing you with insights into the status and location of your delivery agents.
Available
Agents who are ready and available to take on new tasks will be displayed under this status. They are prepared to accept delivery assignments.
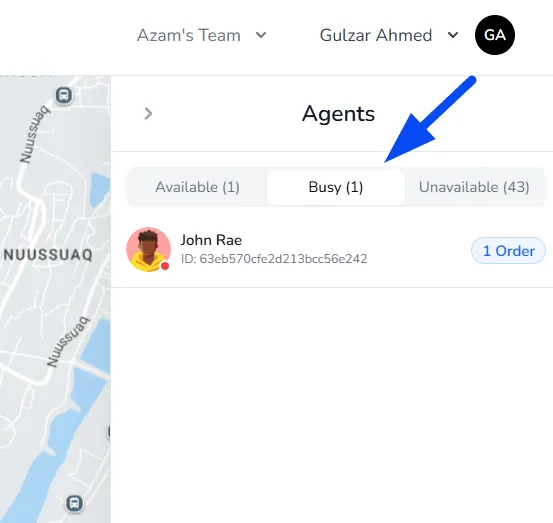
Busy
Agents who are actively engaged in delivering orders are listed here. They are currently en route to fulfill delivery requests.
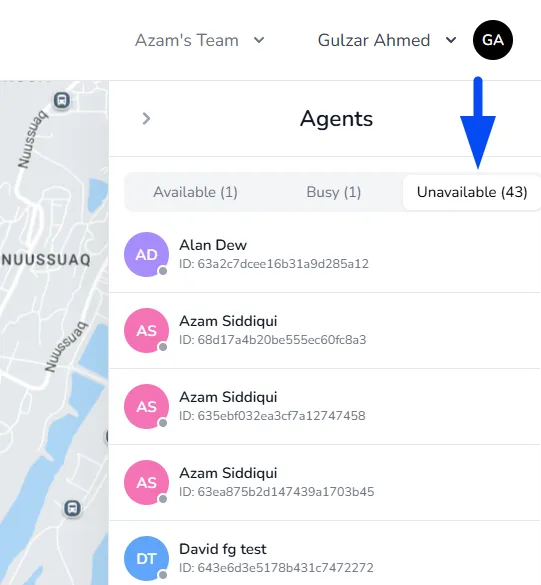
Unavailable
Agents who have turned off their duty status will be listed here. They are currently not available for assignments.
Tracking Rider's Location
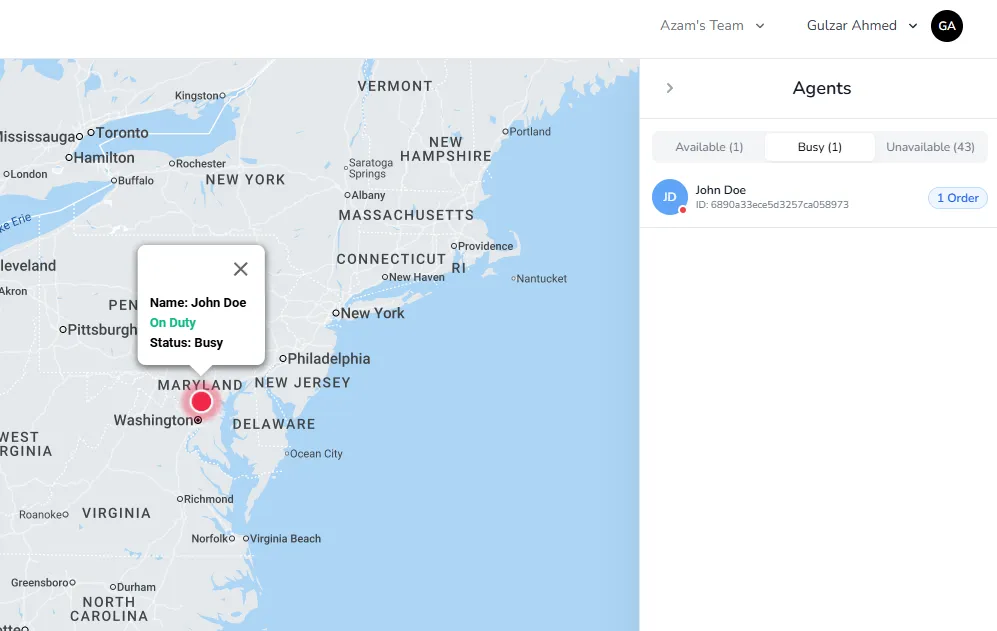
To track an agent's location, simply click on their name within the Agents section. This action will display their current location on the map, along with information indicating whether they are currently carrying out an order or not. This feature allows you to monitor your agents' movements in real-time, enabling efficient coordination and management of delivery operations.
Viewing Rider's Assigned Tasks
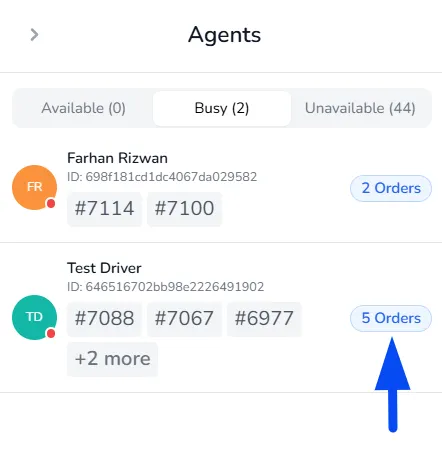
To view a driver’s assigned tasks, go to the Agents panel, find the driver, and click on the “X Orders” button next to their name. This will open a detailed view showing the tasks currently assigned to them.
You can also quickly view the orders currently assigned to each driver directly next to their profile within the Agents section for a quick overview.
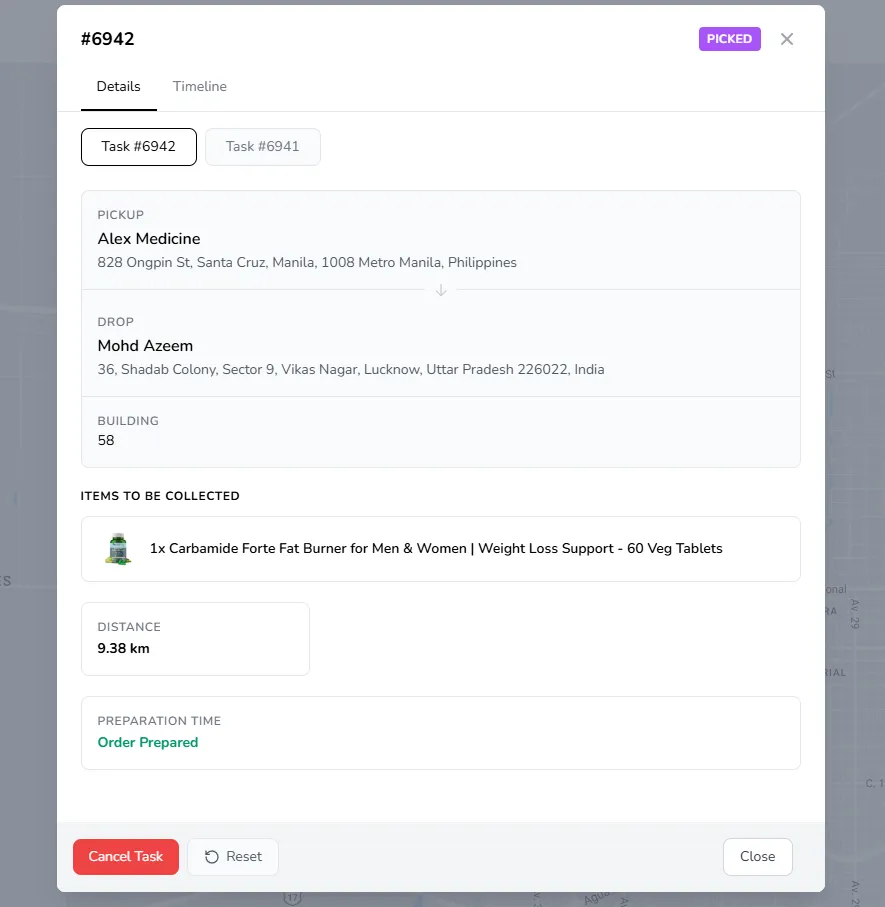
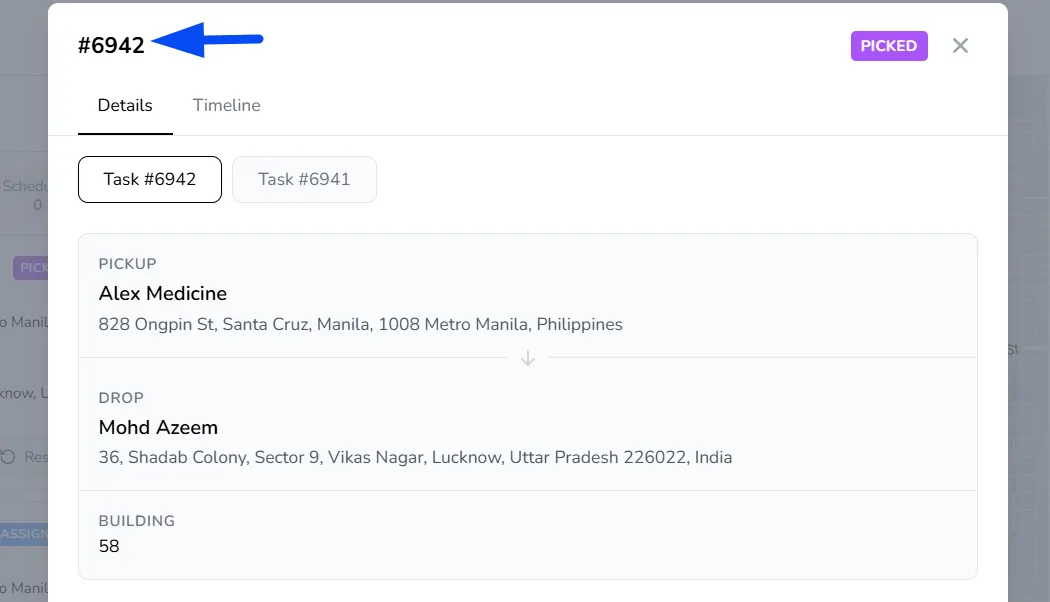
Task & Delivery Information
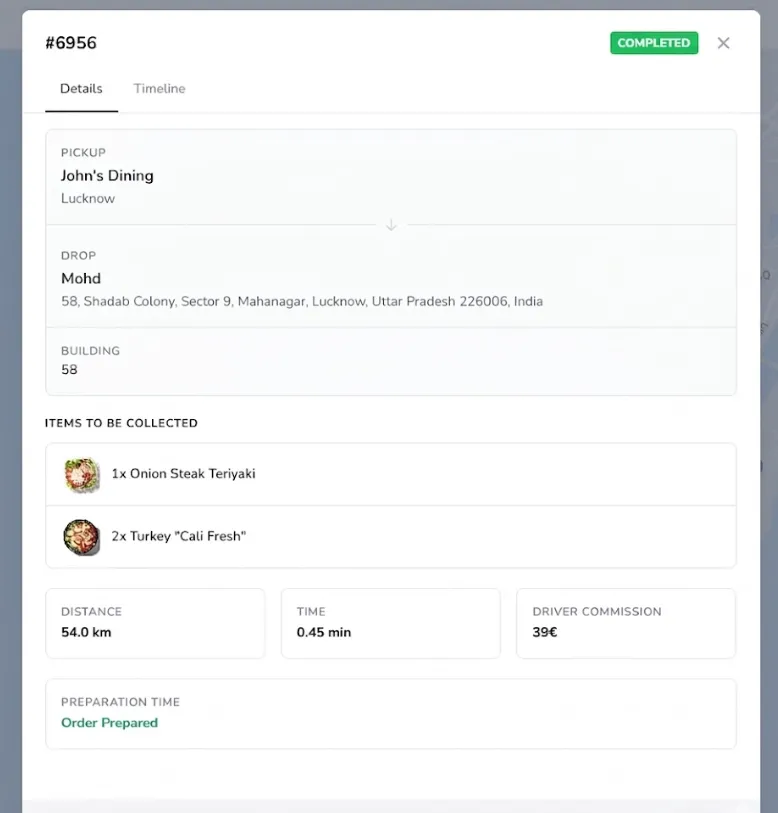
For each agent, you can review the assigned tasks, status of the task, pickup and drop locations, and customer details for each task assigned to the rider.
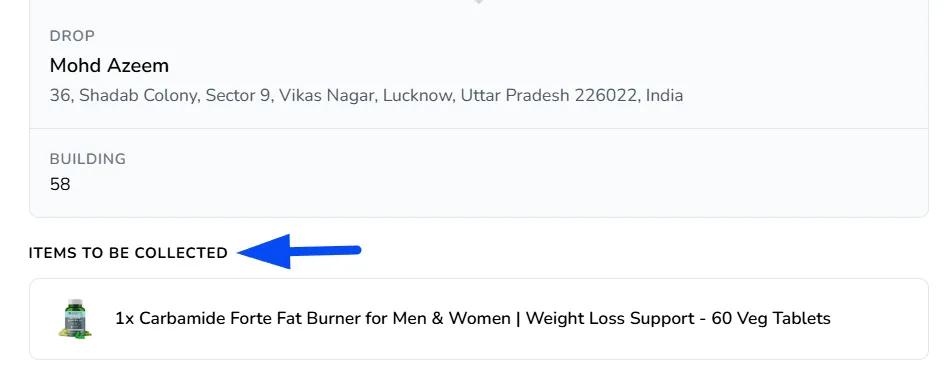
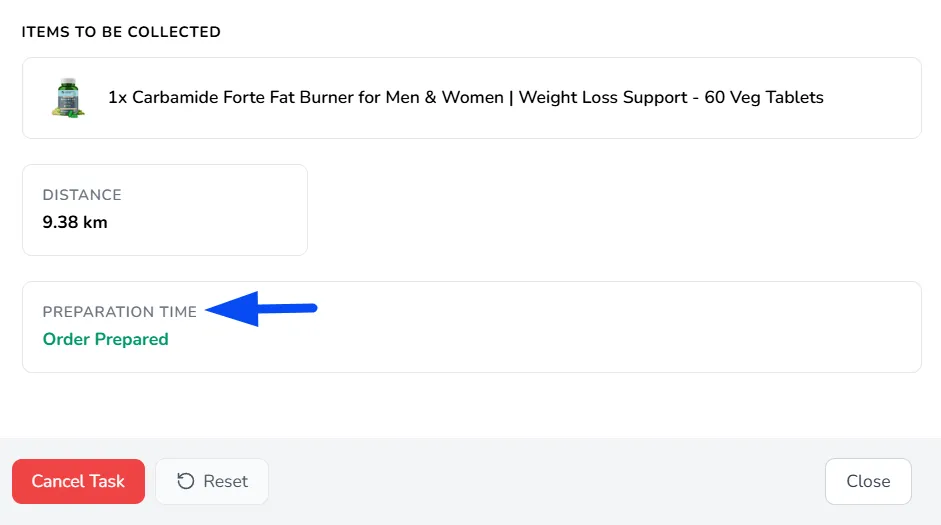
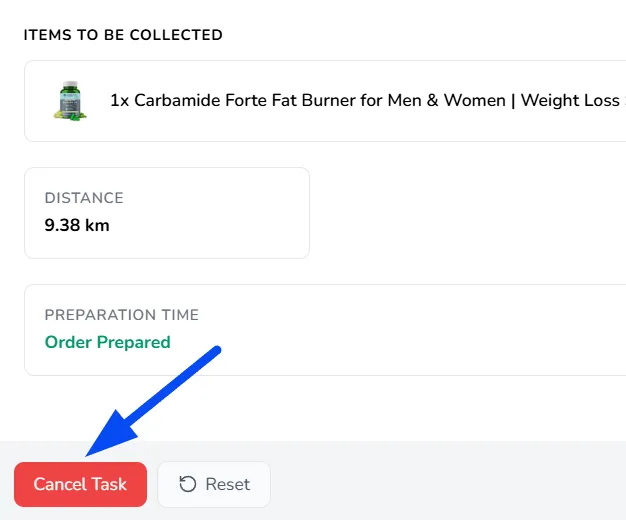
Items to be Collected
Shows the list of products included in the order
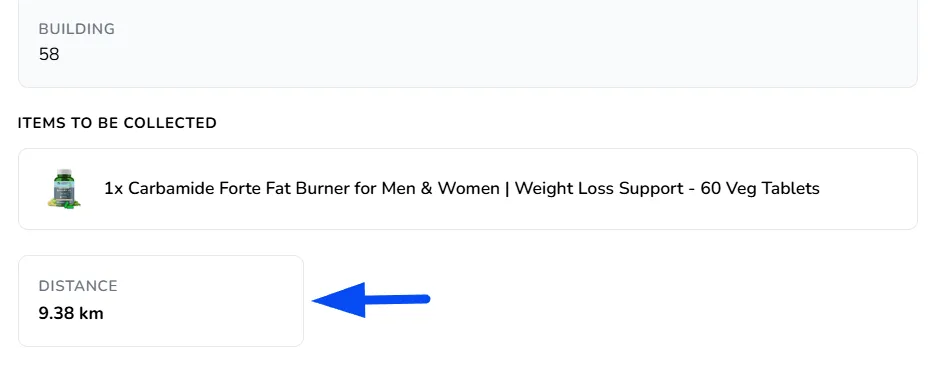
Distance
Shows the total delivery distance for the task.
Preparation Time
Shows whether the order is ready for pickup. If the preparation time is set by the restaurant, it will show the expected time for the order to be ready, thereby helping in swiftly allocating the order to the right rider based on the preparation time.
Note: The Preparation Time will be displayed for all orders, provided that the restaurant has enabled and configured this feature. It reflects the time by which the order is expected to be ready based on the preparation time set by the restaurant.
You can review and manage this setting in the Default Order Preparation Time guide.
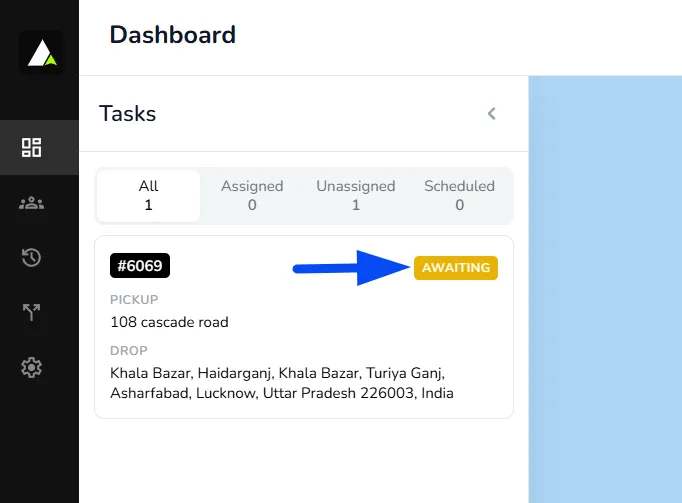
Order States: Awaiting/Created
- Awaiting: This state occurs when the system has sent a request to riders for acceptance of the order. Orders remain in the Awaiting state while waiting for a response from available riders.
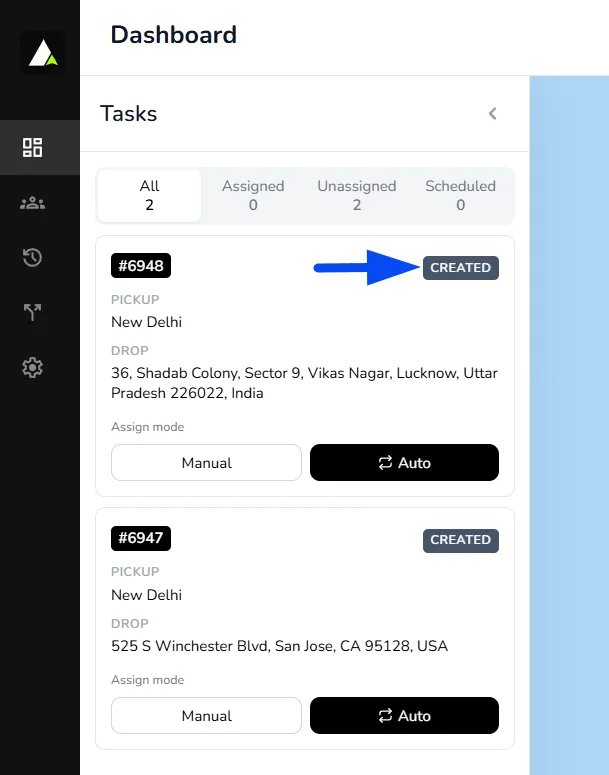
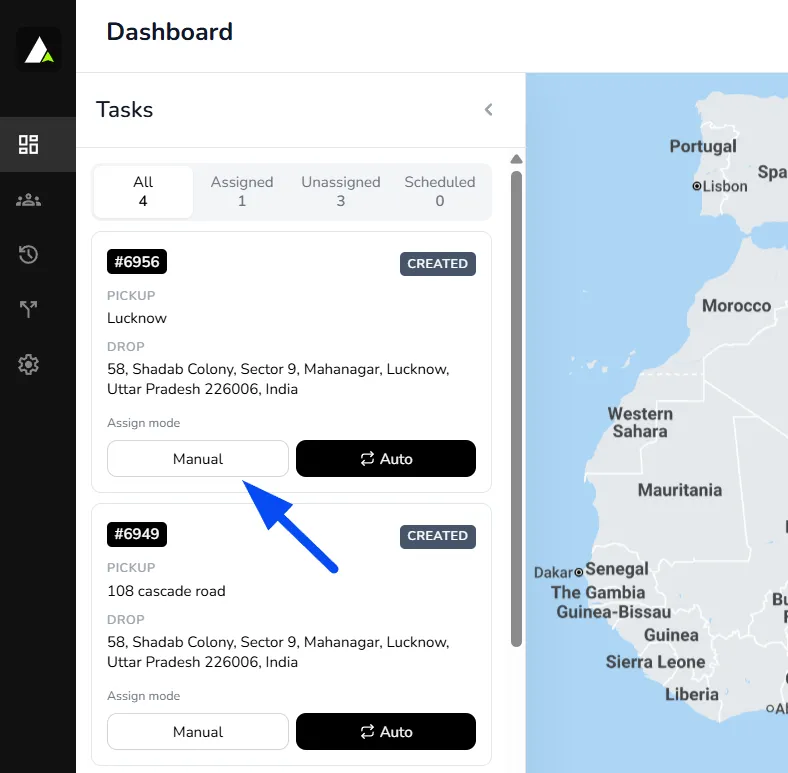
- Created State: In this state, the auto-assignment process halts, allowing manual intervention if needed. Orders in the Created state can be manually assigned to specific riders or restarted in the auto-assigning process if necessary. This state provides flexibility and control over the assignment of orders, ensuring efficient management of delivery operations.
Reassigning Orders
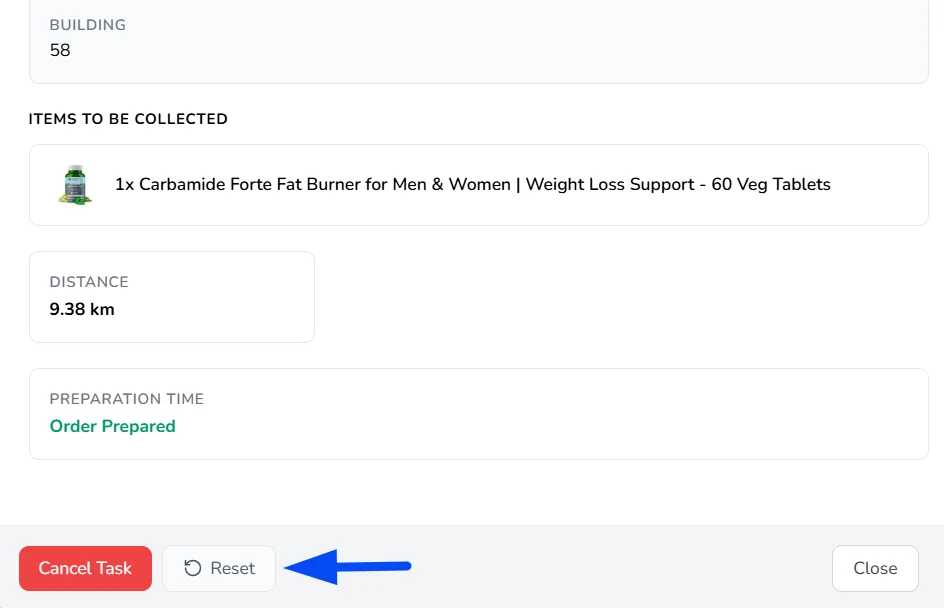
Once an order has been assigned to a rider and is in the "Assigned" mode, you can initiate the reassignment process by selecting the specific order and then clicking on the "Reset" button. This action transitions the order back to the "Created" state, allowing for the reassignment of the order to another rider as necessary, providing flexibility in order management.
Cancelling Orders
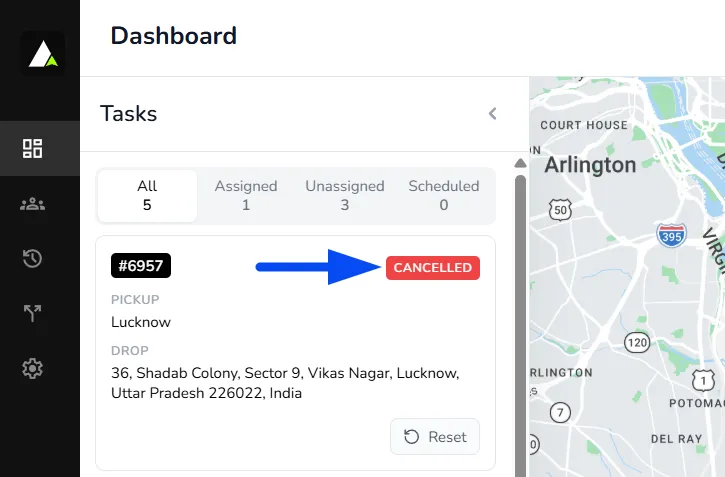
To cancel an order, simply click on the order and click on the "Cancel Task" option. After the task is cancelled, it will be reflected with the status of "Cancelled."
Note: In case you want to reset the Cancelled Order, you can click on the "Reset" option, and accordingly, the order will reset to the "Created" state
Manual Order Assignment
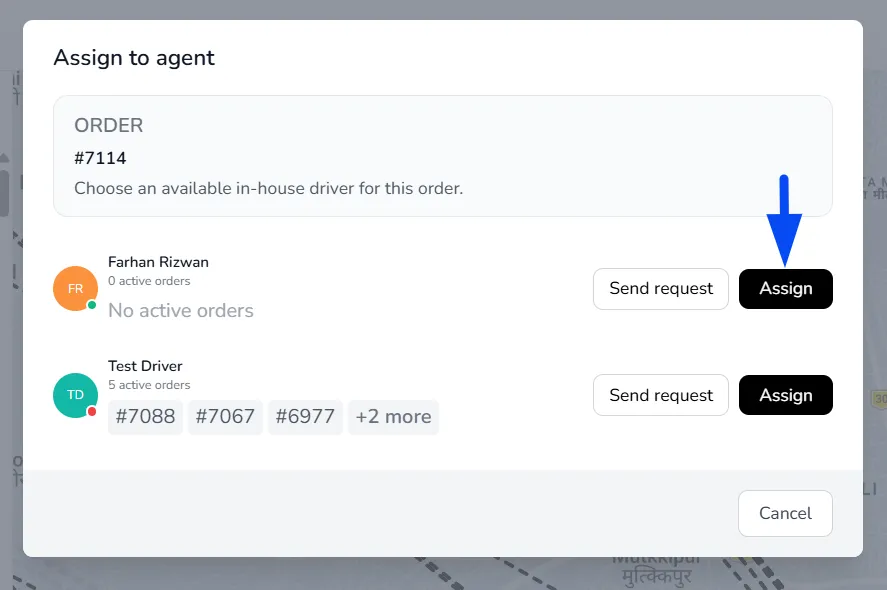
When an order enters the "Created" state, manual assignment becomes available. By selecting "Manual" and choosing an agent from the list, you can assign the order swiftly. This feature streamlines allocation, ensuring efficient distribution among agents.
Send Request
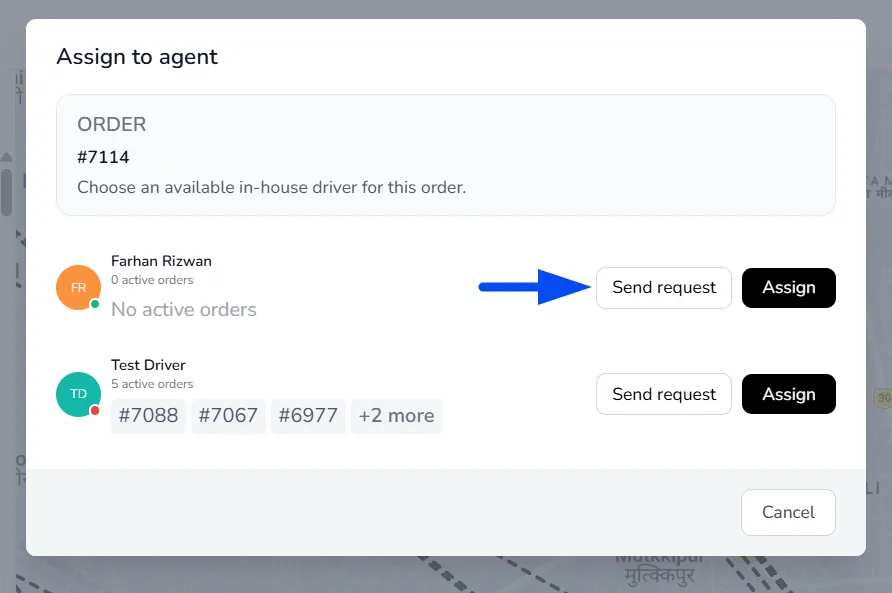
The Send Request option allows you to send an order request to a specific agent. The agent will receive the request and can accept or reject it based on their availability.
Assign
The Assign option directly assigns the order to the selected agent without requiring their approval.
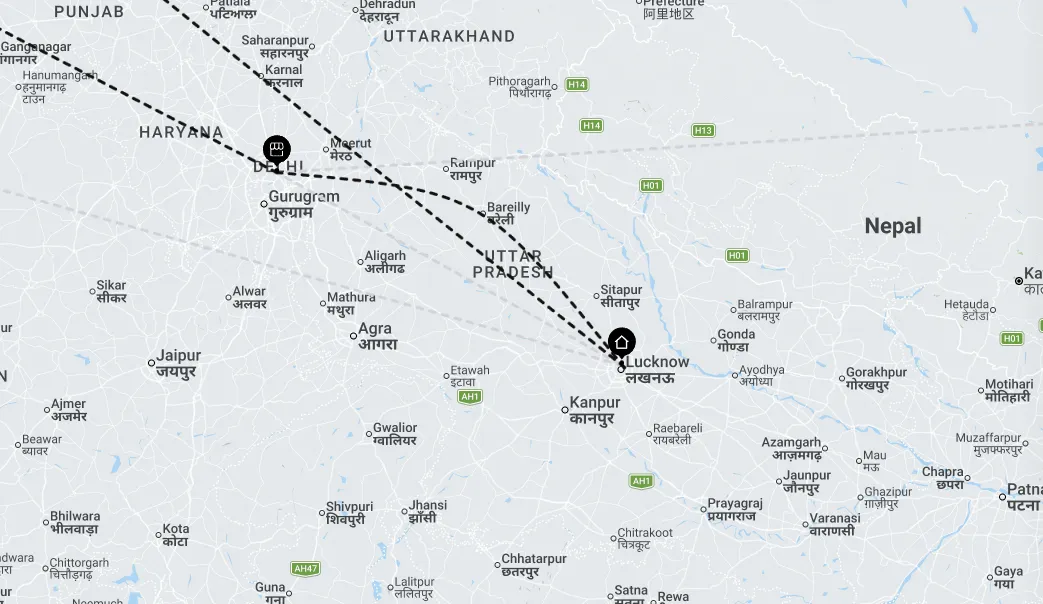
Order View on Map
This feature simplifies the order manager's view by marking the pickup and drop-off points on the map. A straight line between these points offers a clear visual guide, facilitating easier understanding of the order's trajectory without detailed navigation information.
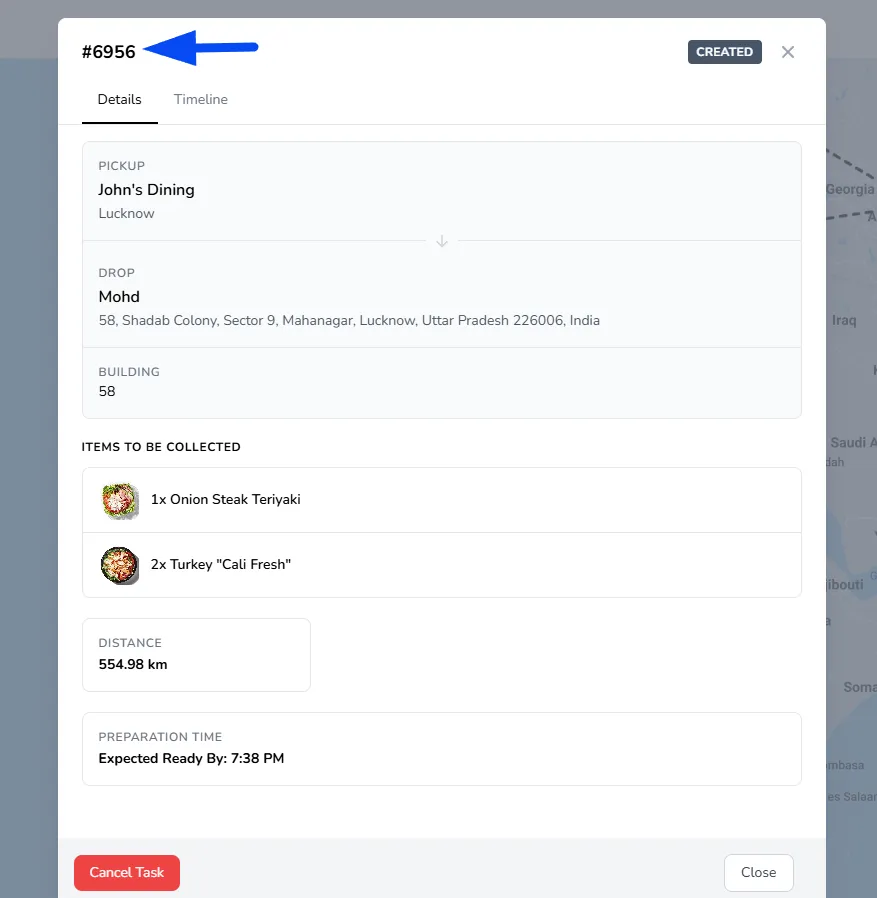
Order Details/History
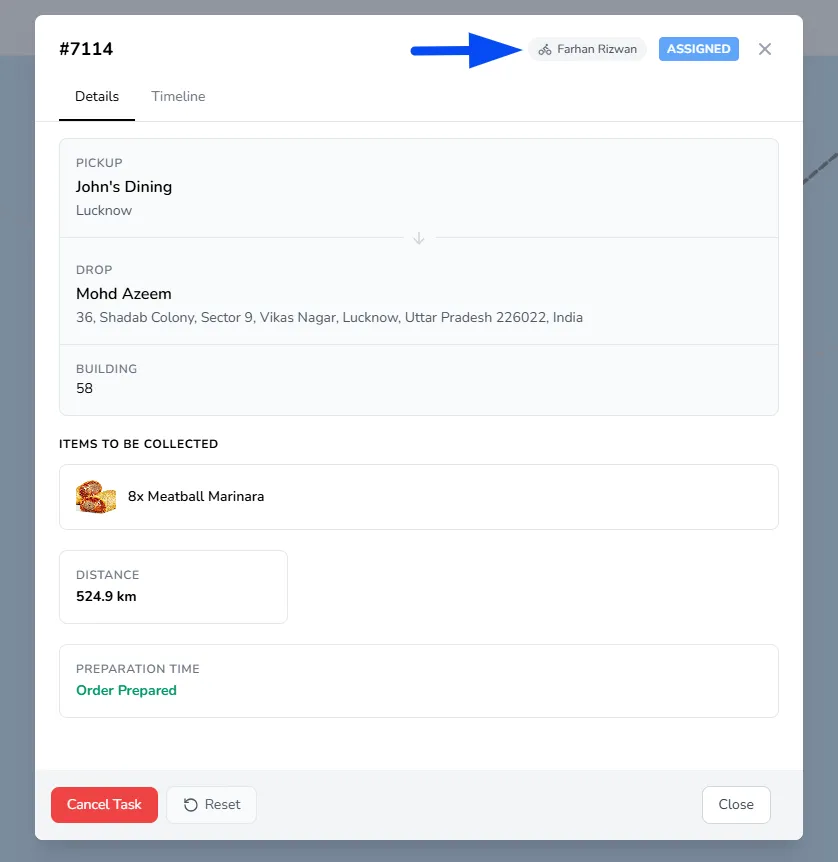
- Details: Access detailed information about an order by clicking on the Order. Here, you can view essential details such as the pickup and drop-off points and the distance between them, etc.
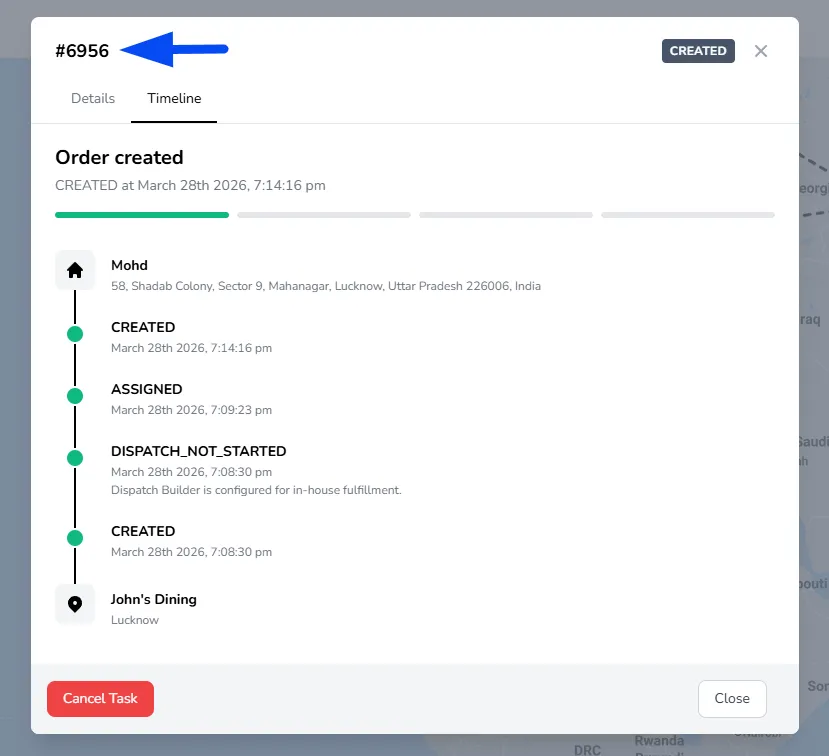
- History: Additionally, by clicking on the order and within the Timeline tab, you can monitor the order's status history and view updates along with their respective timestamps. This feature provides a comprehensive overview of the order's journey and status changes over time.
- Assigned Driver: You can also see which driver the order is currently assigned to directly within the order view, giving you clear visibility into task allocation.
Rider's Commission Calculation State
After an order is successfully completed and the "Task Lock Minutes expire, a "lock" button will appear on the order. Simultaneously, the order fulfillment time & rider's commission for that order will be displayed under the Details tab. This commission amount mirrors what is shown to the rider on their driver app, ensuring transparency and consistency in payment calculations.
Furthermore, for comprehensive record-keeping and rider payout management, you have the option to download this information from the reporting feature.