Customers
How to utilize the platform for "call-in-order"/ "in-store ordering" purposes?
This setting allows order placement on behalf of customers with seamless auto-login functionality for call-in or in-store ordering. Simultaneously, it facilitates bulk customer data export, empowering strategic marketing campaigns. Simplify your processes for enhanced customer engagement effortlessly.
Navigating to the Customers section
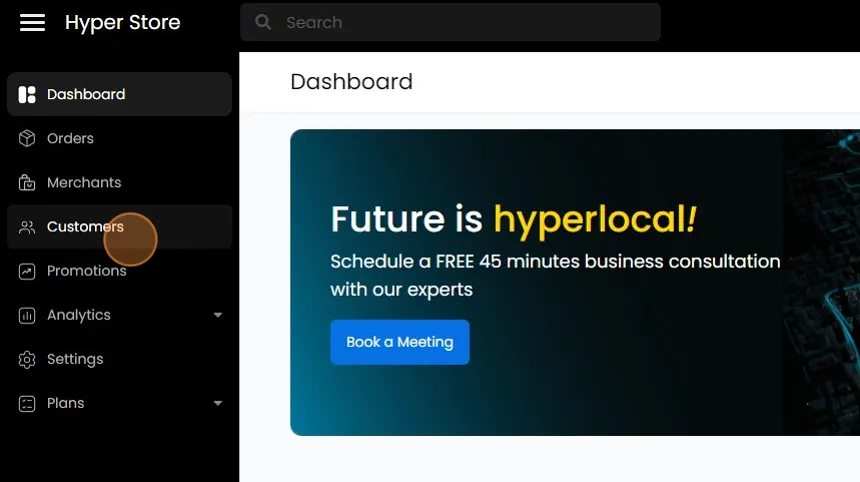
- On the Admin panel, click on "Customers"
Create a Customer
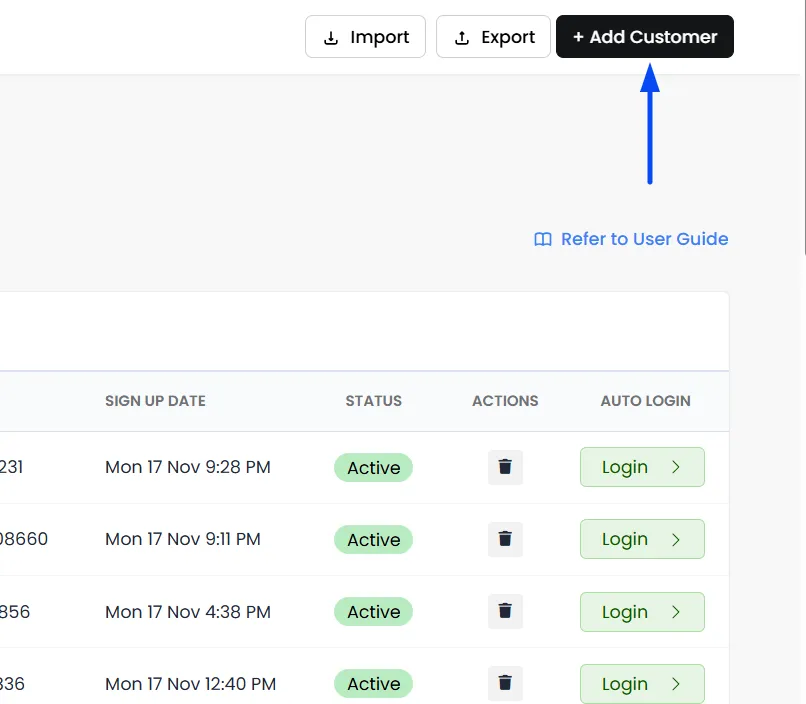
- Click on Add Customer to create a new one
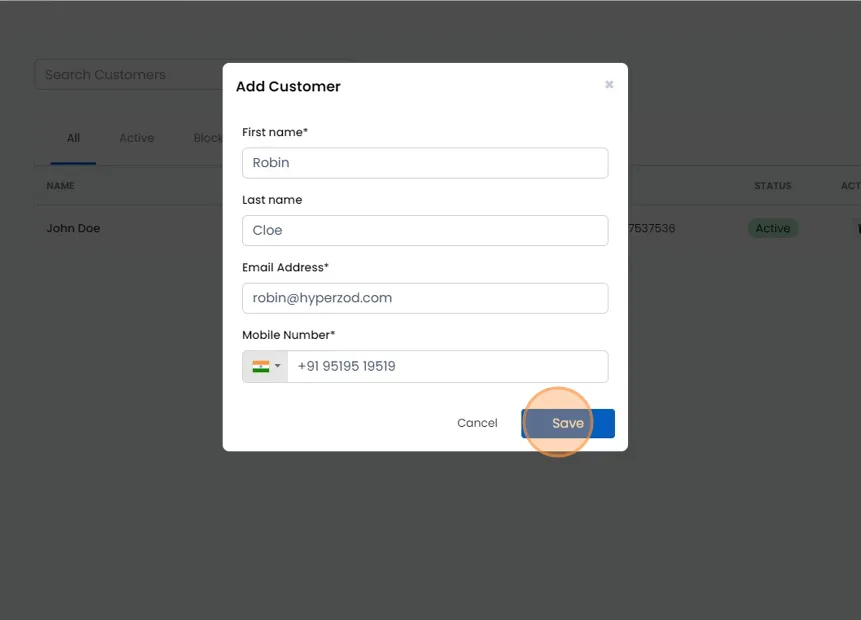
- Enter basic info such as First Name, Last Name, Email Address, and Mobile Number with country code selection. Lastly, click "Save" to add.
Note: Customers can browse the store as guests. However, login is required to place an order, as customer details such as their name, phone number, and email address are required to ensure a smooth delivery experience.
Auto-Login Customer Profile
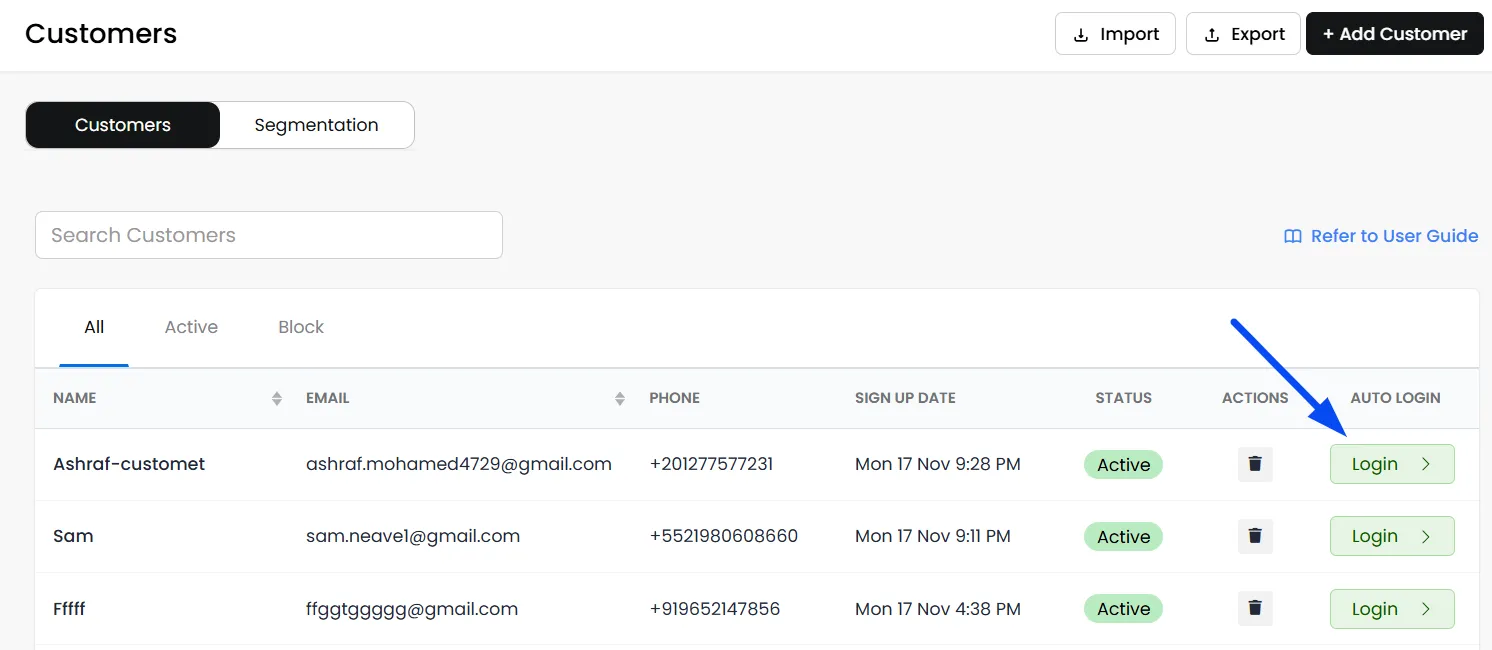
Auto-Login: Allows you to seamlessly log in as the selected customer on the ordering website. This allows you to perform various customer-related functions like placing orders on their behalf, editing profiles, or managing their addresses.
Note: When performing any task on behalf of a customer, such as placing a new order or updating their address through the Customer Profile, ensure that only the customer’s profile is logged in to the browser. This helps prevent caching issues that may cause duplicate information to be displayed.
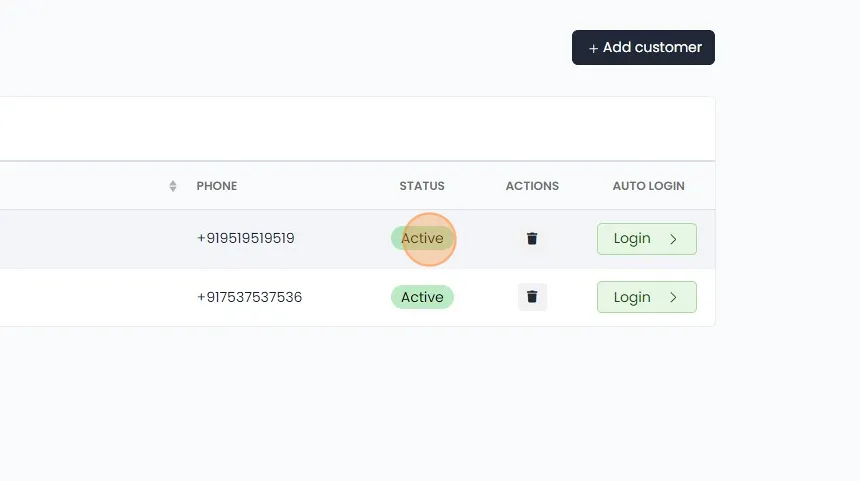
Block/Unblock Customer
Easily update a customer's status by clicking "Block/Unblock." This feature provides quick control over customer access.
Note: The Block Customer option allows you to restrict a customer from accessing the platform and placing any future orders. This can be used to prevent customers who are misusing or abusing the platform from continuing to use its services.
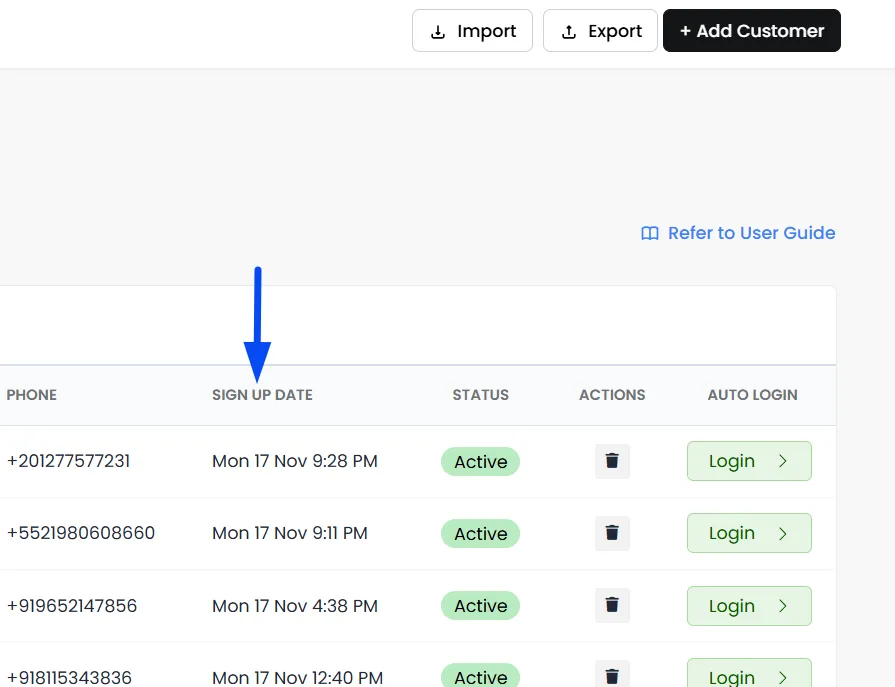
Sign Up Date: The date and time the customer created their account on your platform.
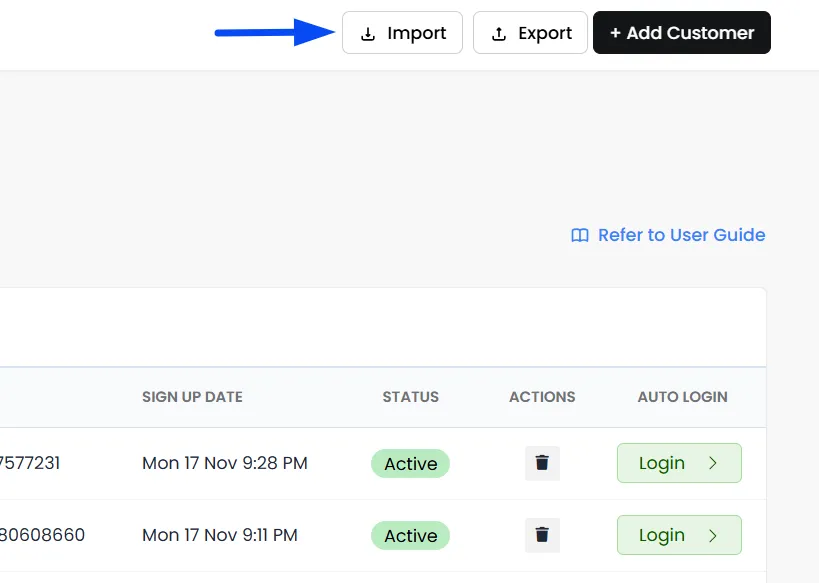
Import Customers
The Import feature allows you to add all the customers at once using a spreadsheet file.
- From the Customers list, look to the top-right corner and click the Import button.
Follow these steps carefully for a successful import:
- Download the Template: Click the Download link to get the reference CSV file. This is your template.
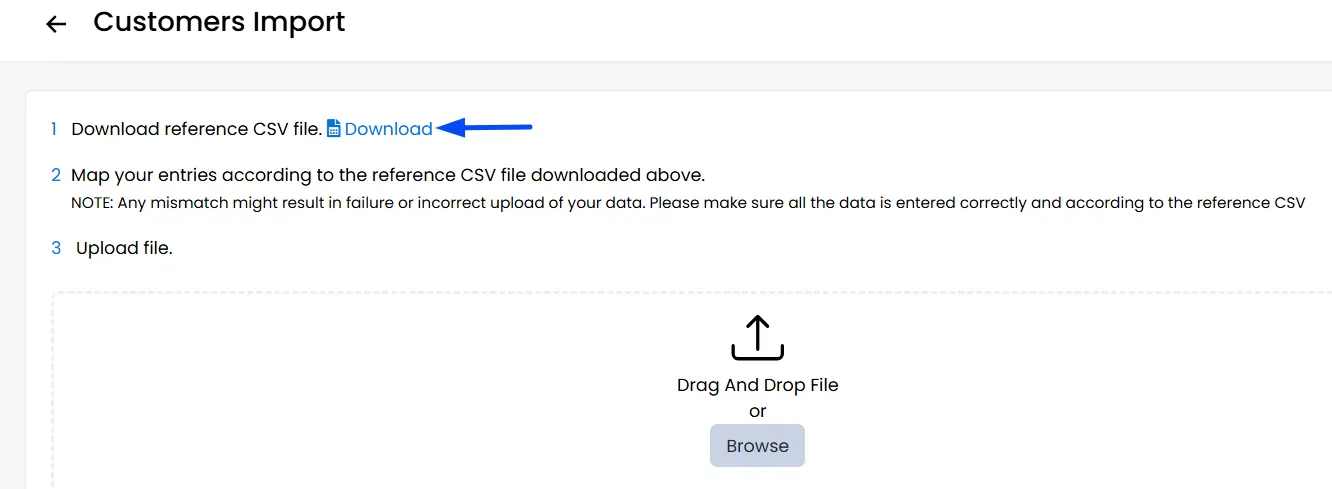
You must use the provided template. The column names and order must match the reference file exactly to work correctly.
- Fill in Your Data: Open the downloaded CSV file in a spreadsheet program (like Microsoft Excel or Google Sheets). Add your customers' information into the appropriate columns. Save the file.
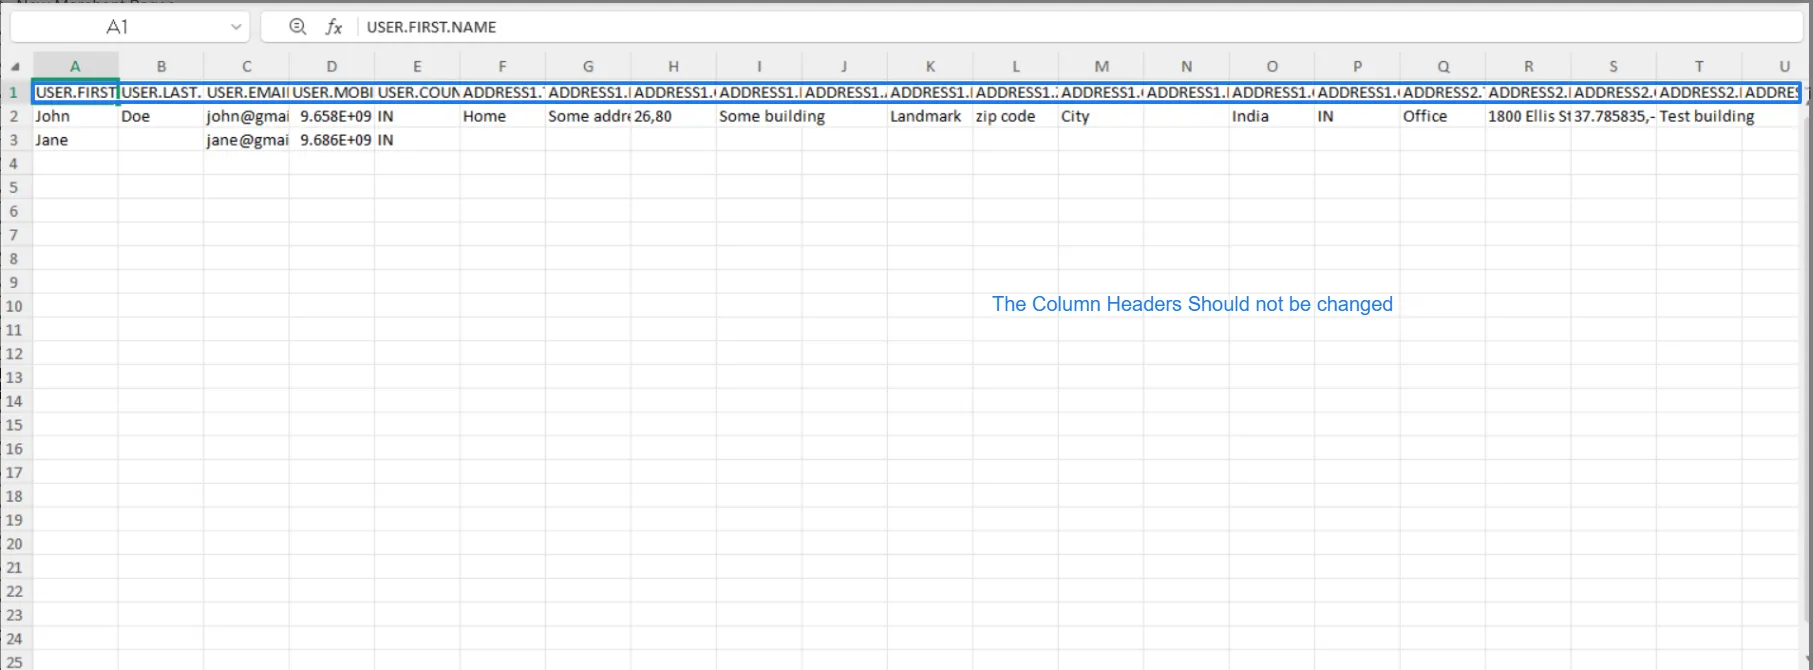
- Upload Your File: Drag your completed CSV file into the upload box, or click Browse to select it from your computer.
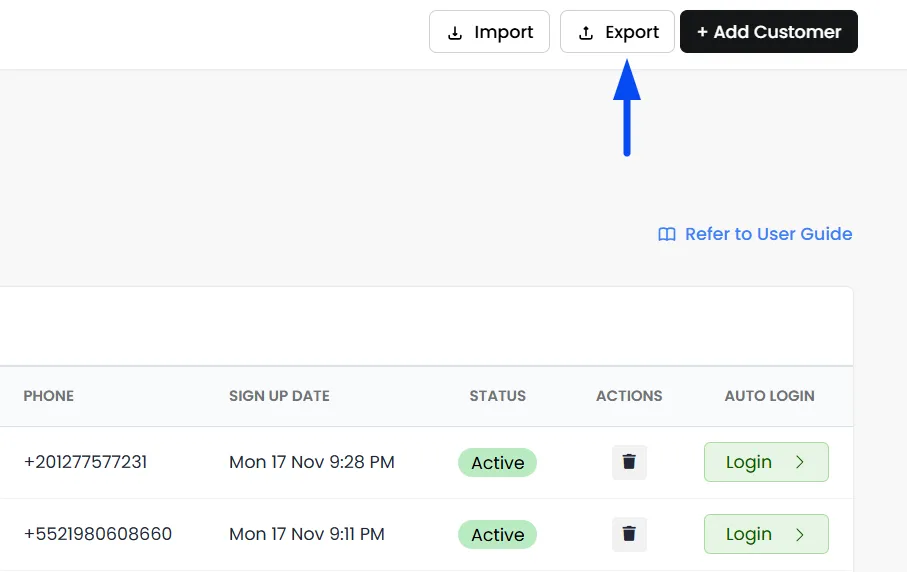
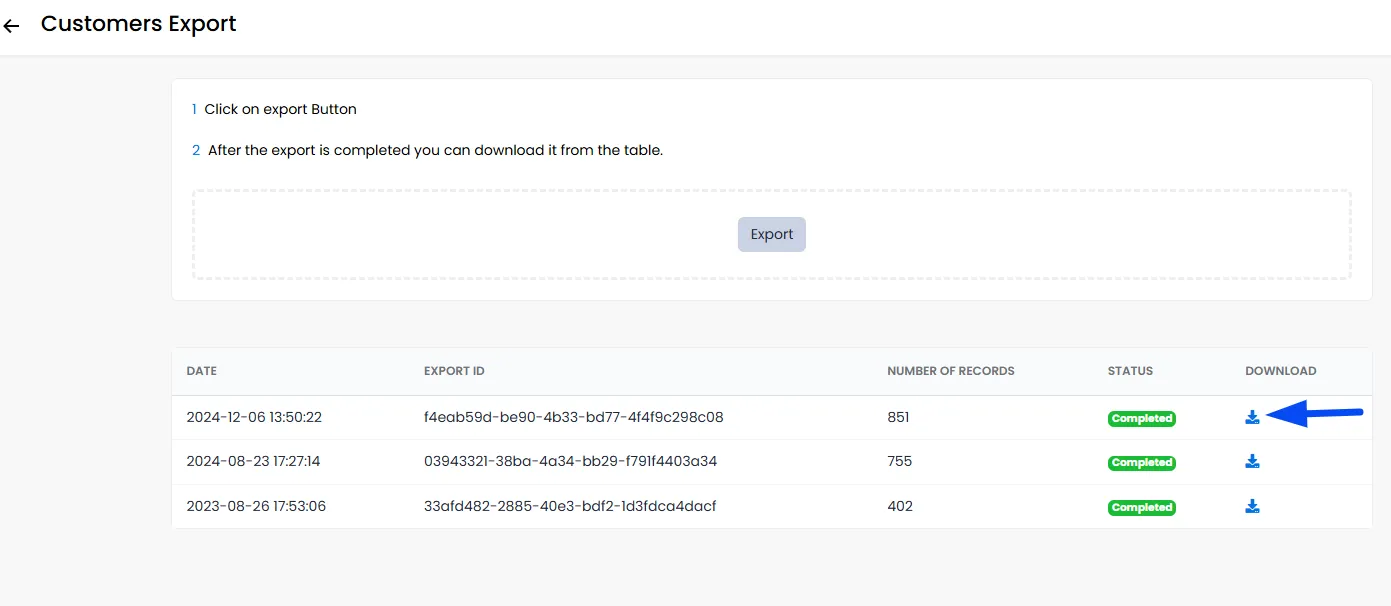
Export Customers
Download the Excel file containing all existing customer details. Use this for efficient customer data management or utilize it in marketing tools to run marketing campaigns.
Frequently Asked Questions (FAQs)