Omniful POS Integration
Omniful Tenant Integration
STEP 1: Configure Tenant Integration
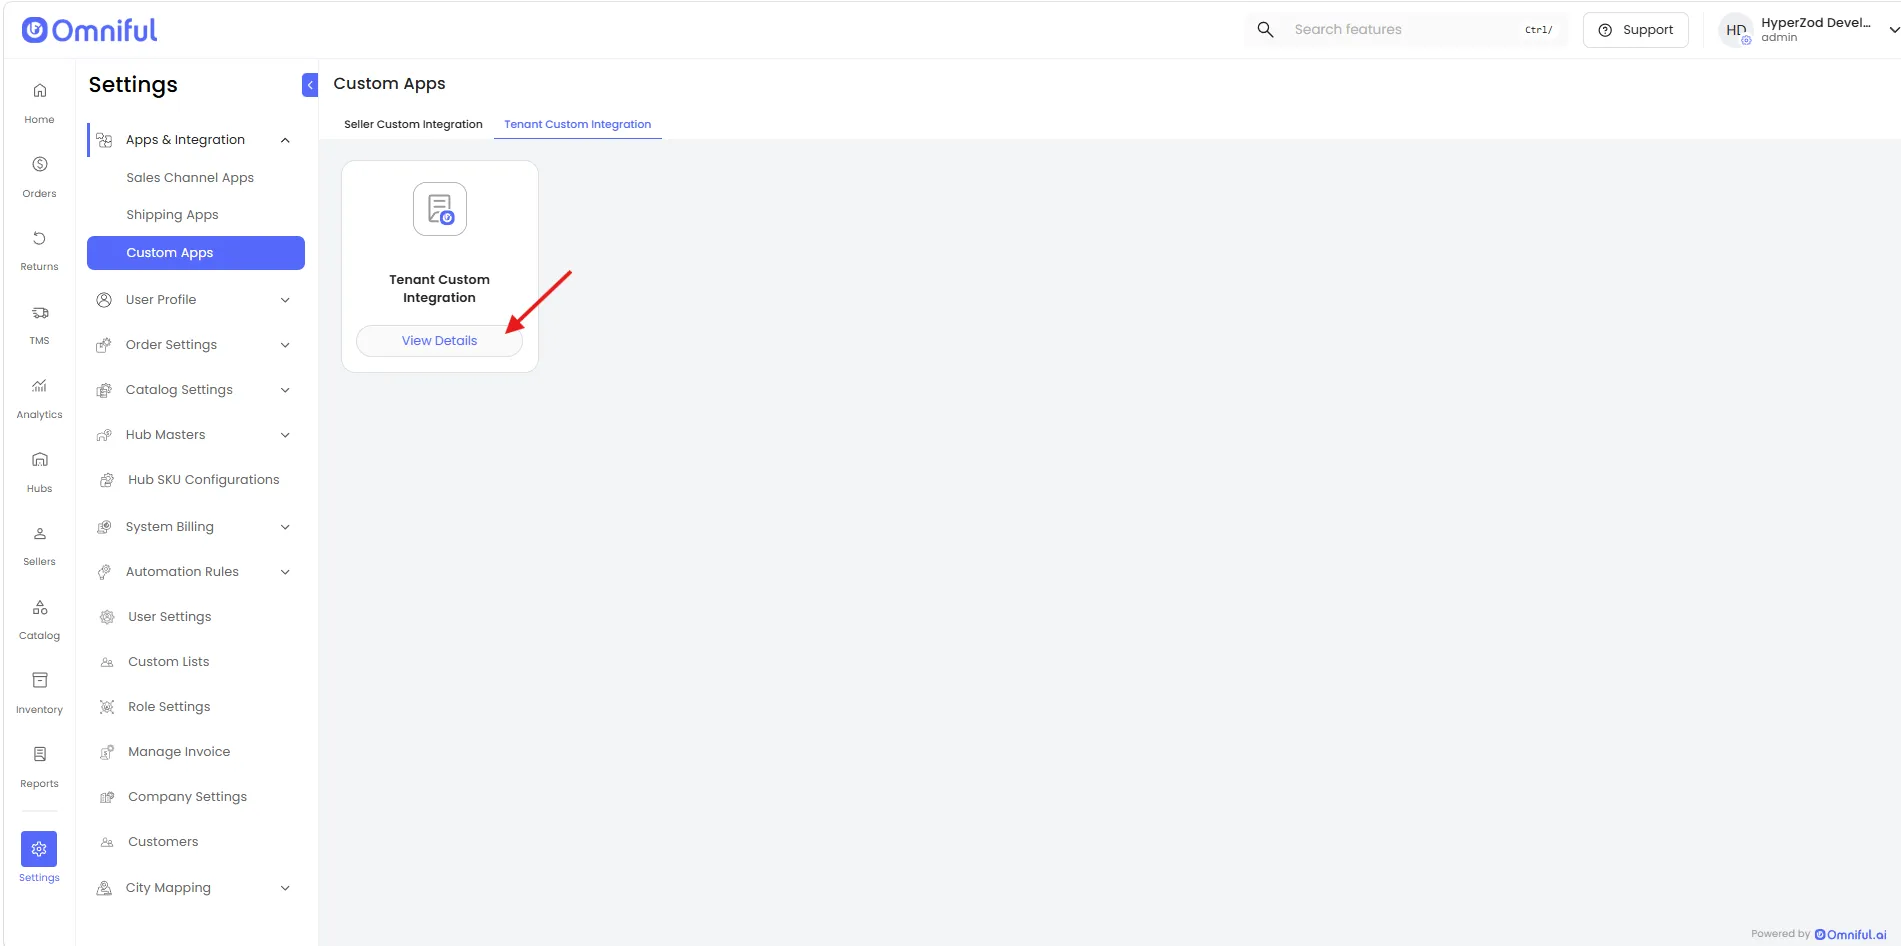
- In Omniful, go to Settings → Apps & Integration → Custom Apps.
- Switch to the Tenant Custom Integration tab.
- Click Create Tenant Integration to set one up.
- Once created, click View Details on the Tenant Custom Integration card.
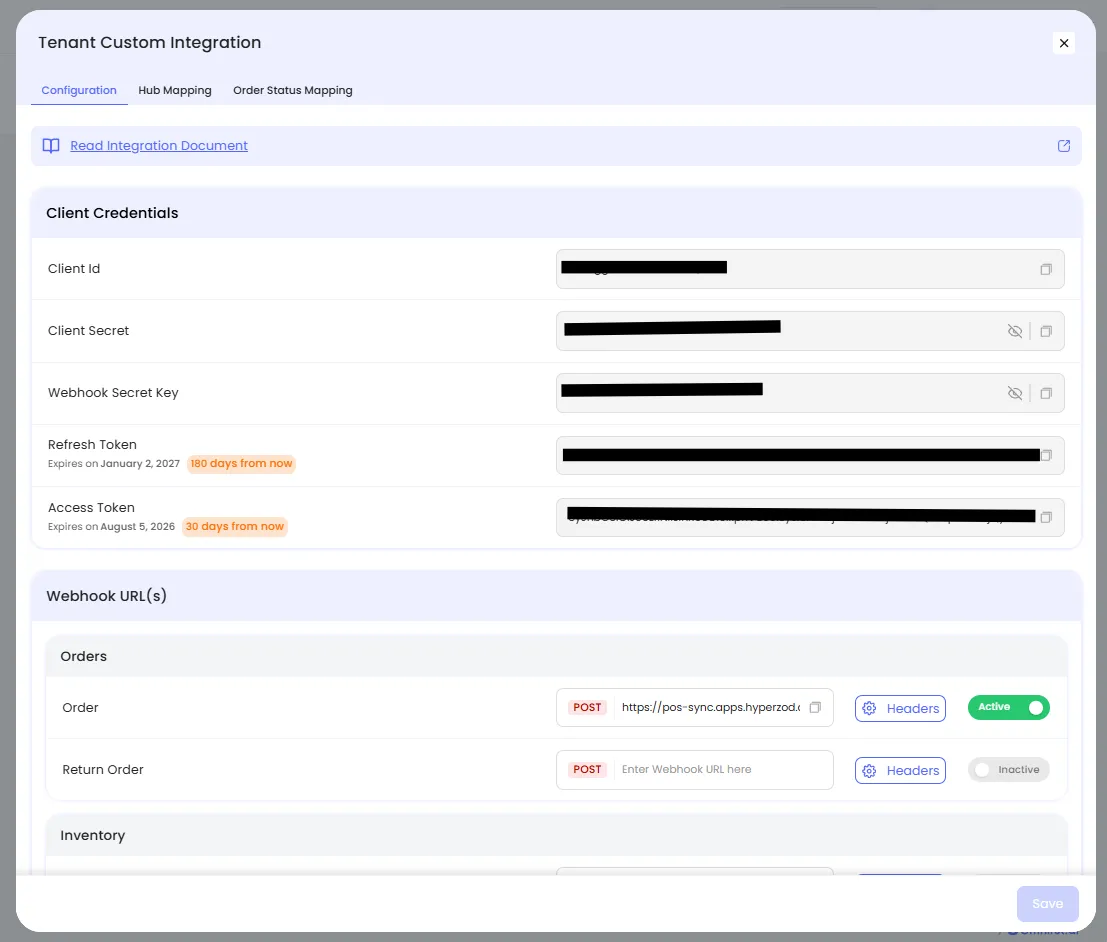
- Under Client Credentials, copy the Client ID, Client Secret, and Refresh Token.
Admin Panel
STEP 1: Configure Omniful in Hyperzod Apps
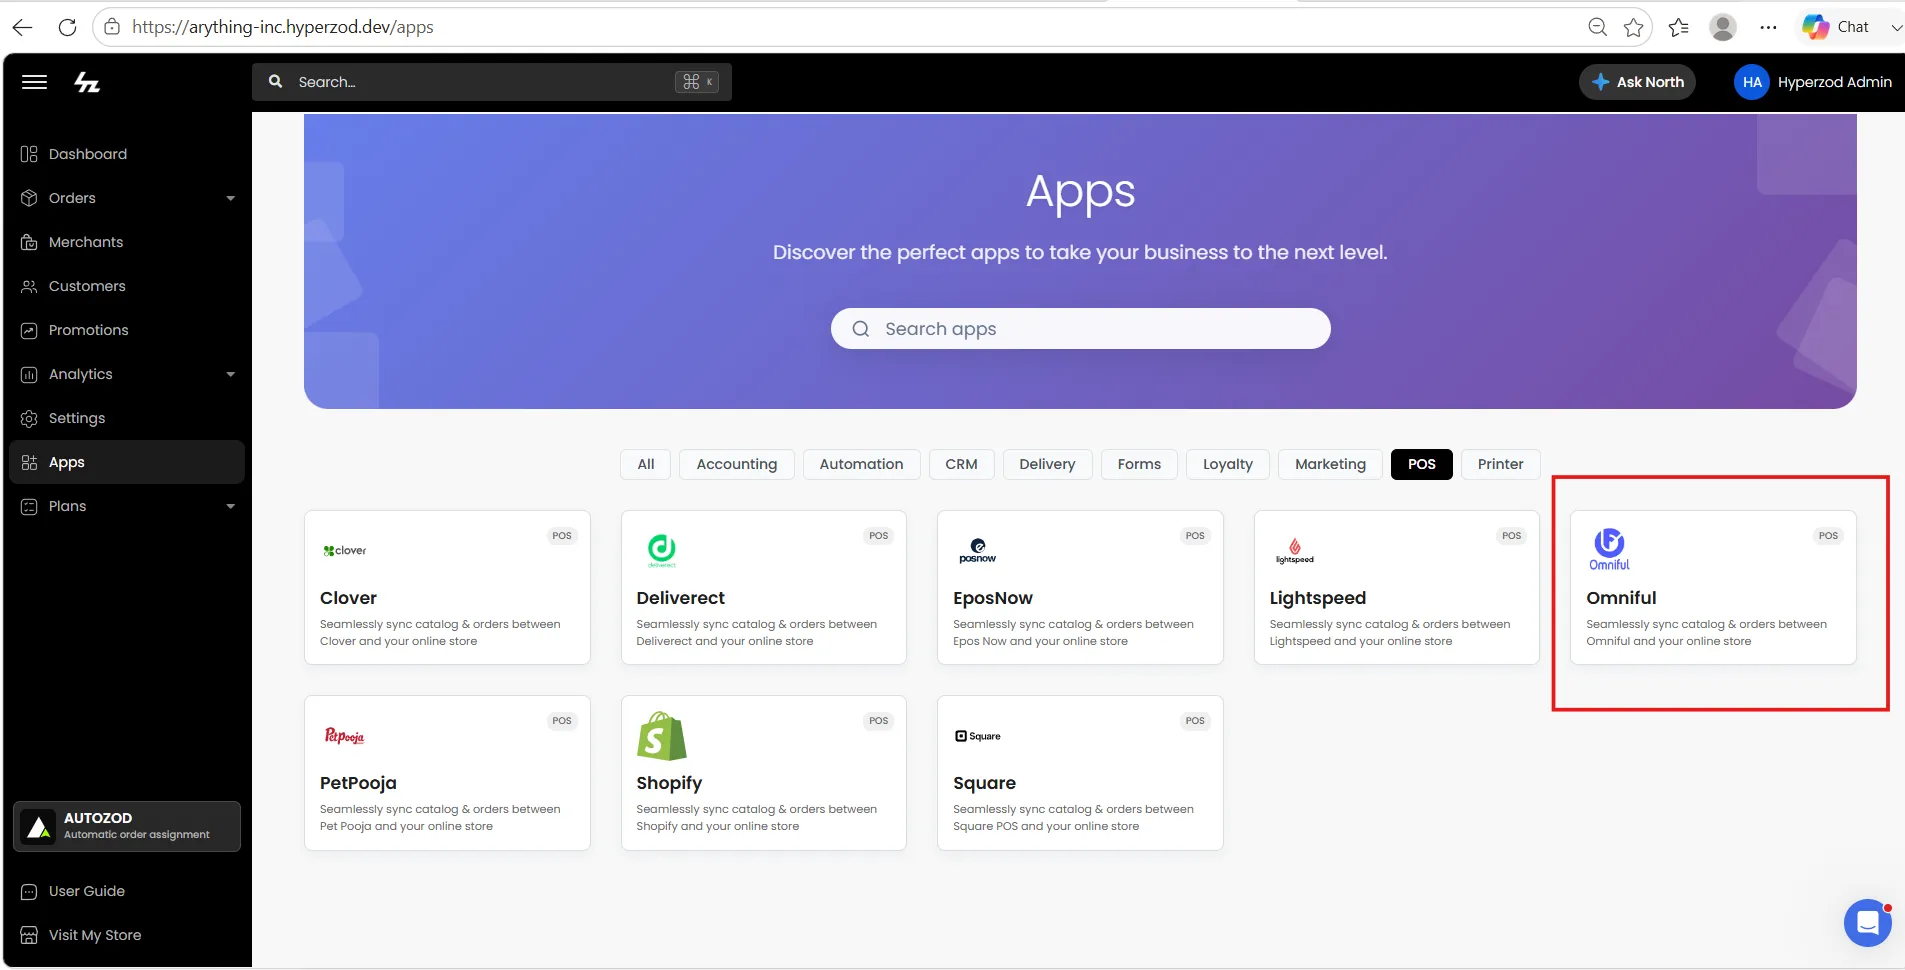
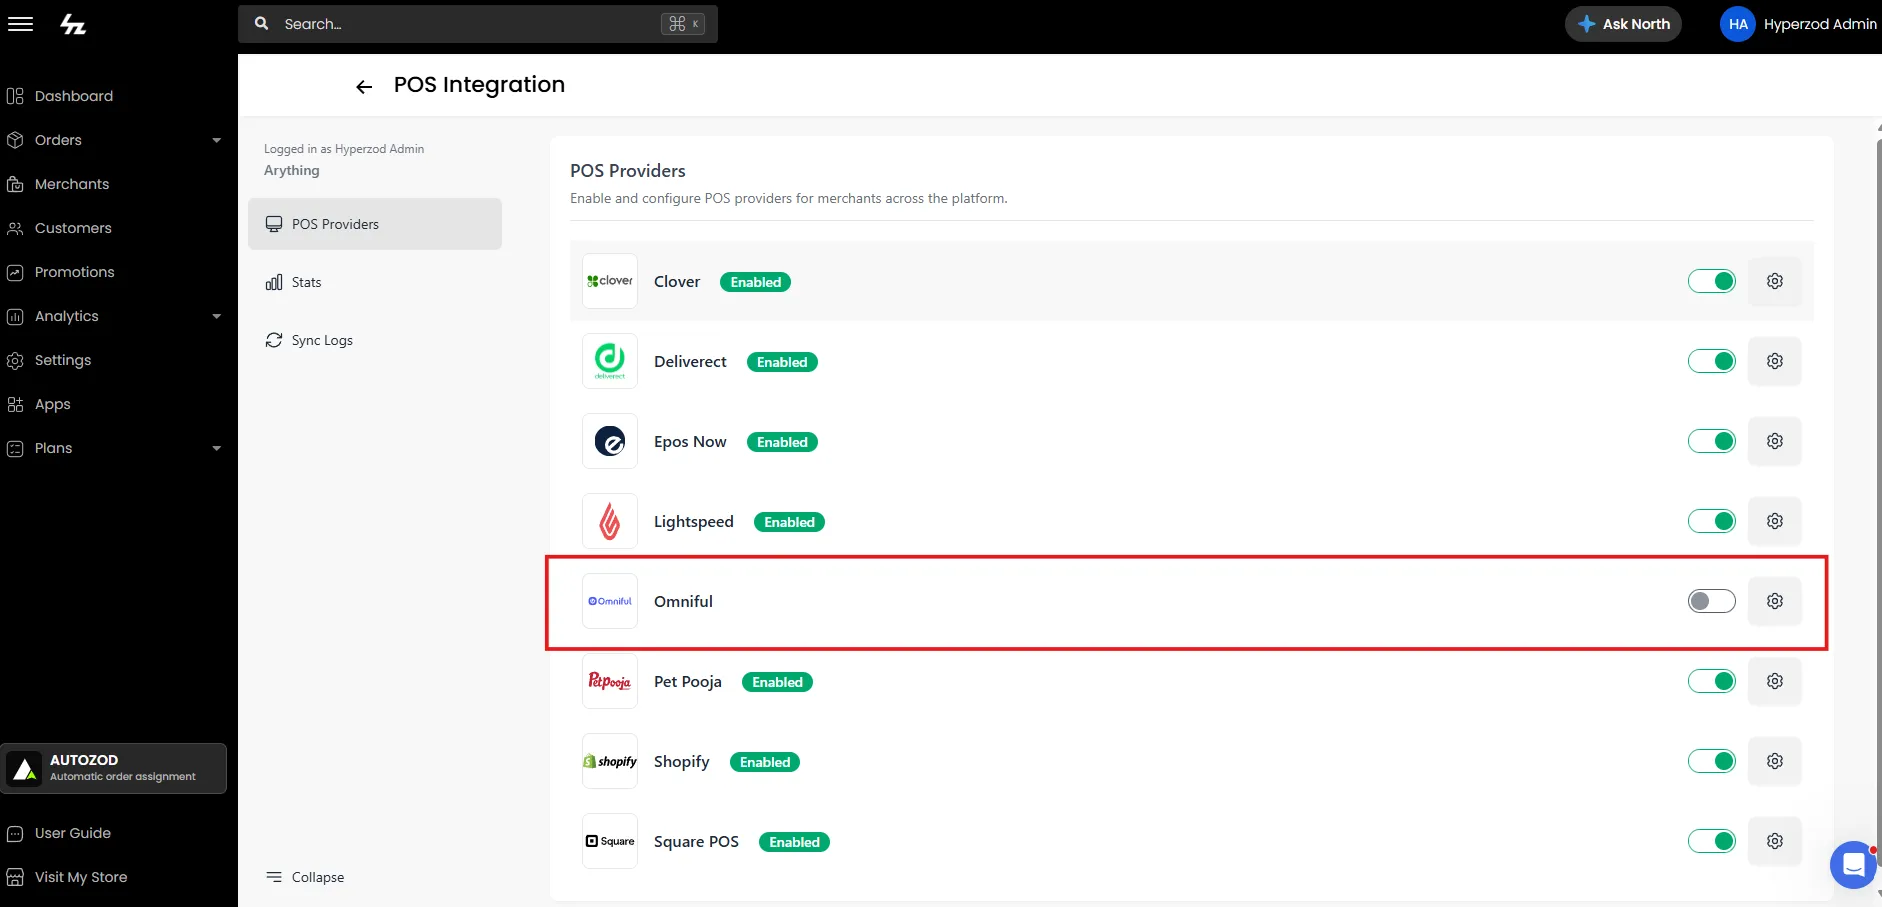
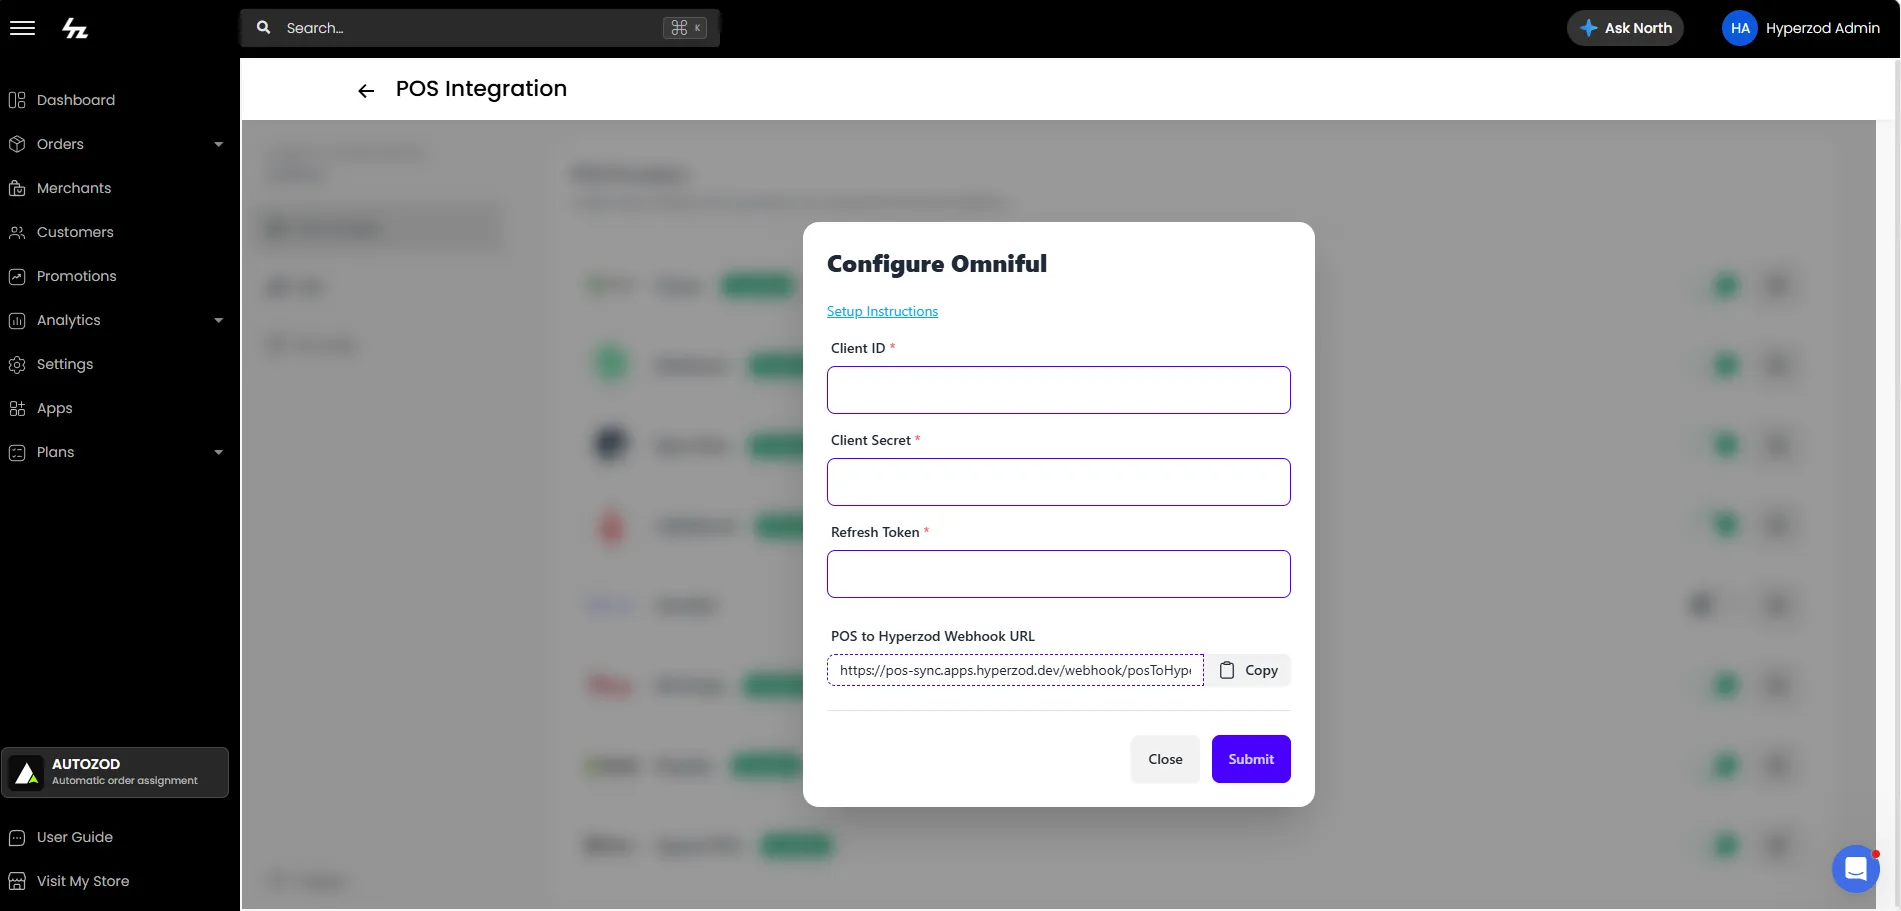
Provide the following details:
- Client ID
- Client Secret
- Refresh Token
Click Submit to save the configuration.
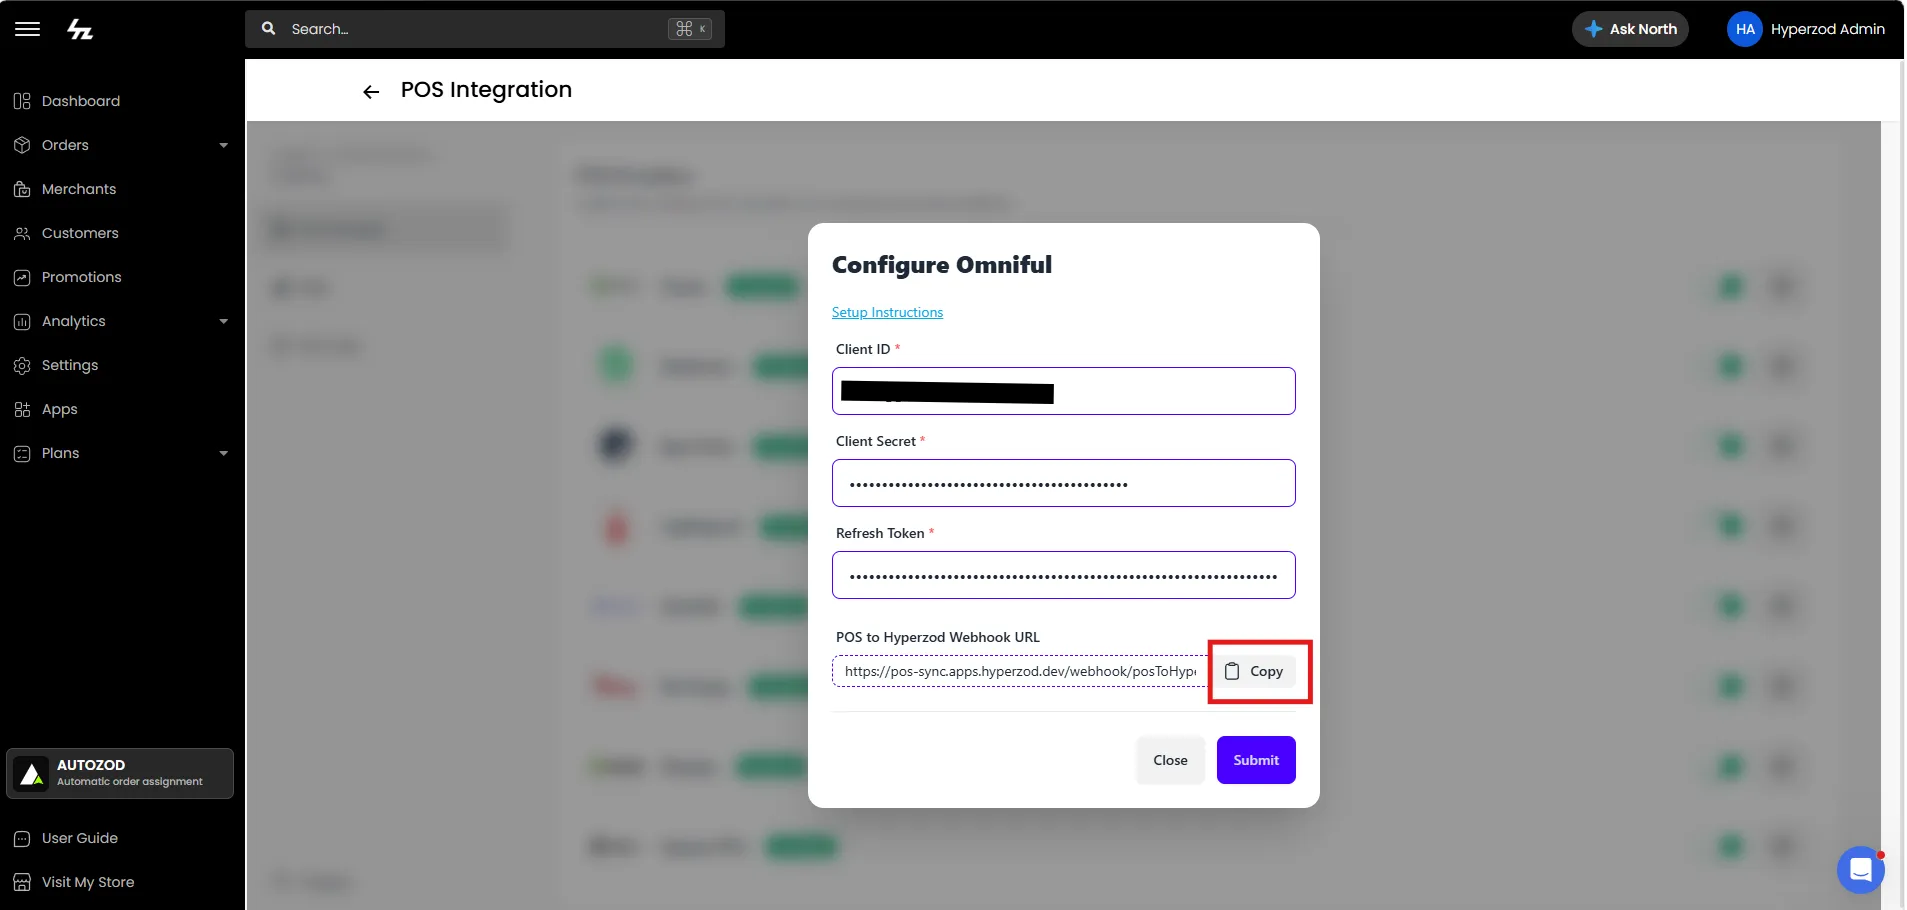
STEP 2: Copy Webhook URL and Subscribe
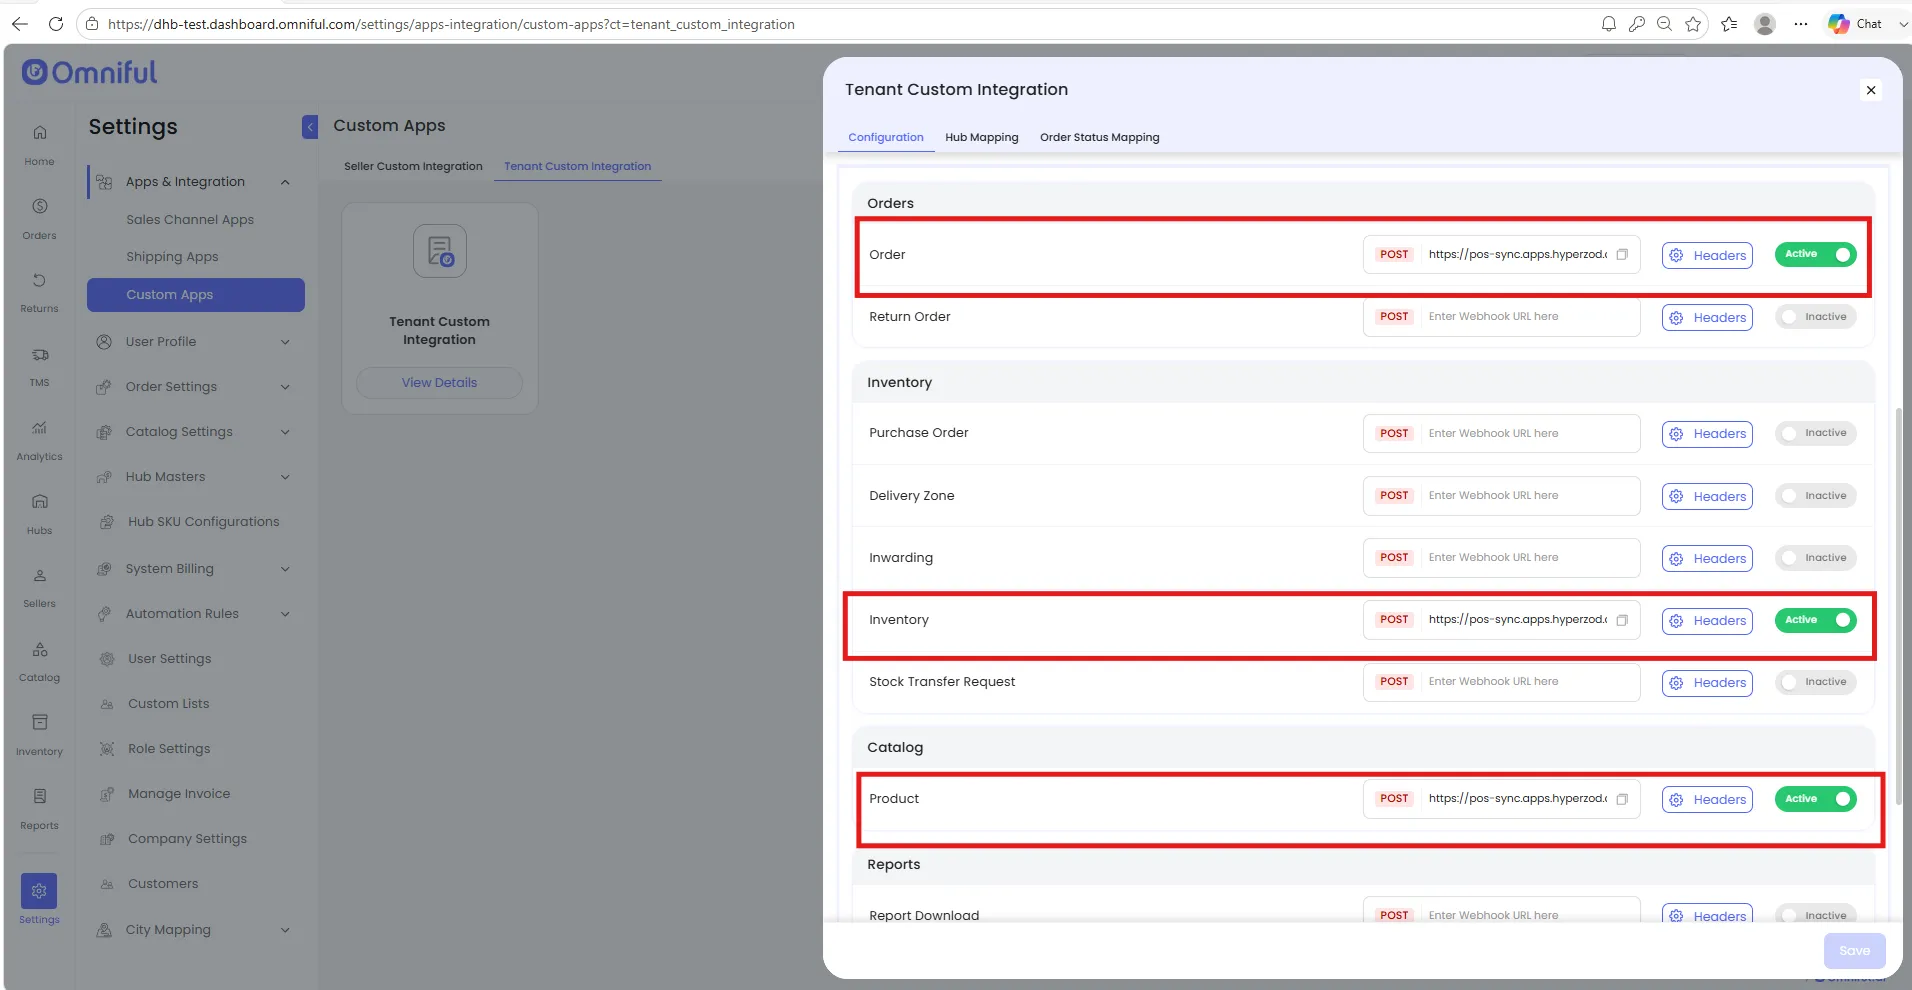
Copy the Hyperzod webhook URL and paste it into the Order (under Orders), Inventory (under Inventory), and Product (under Catalog) fields in Omniful, toggle each Active, then click Save.
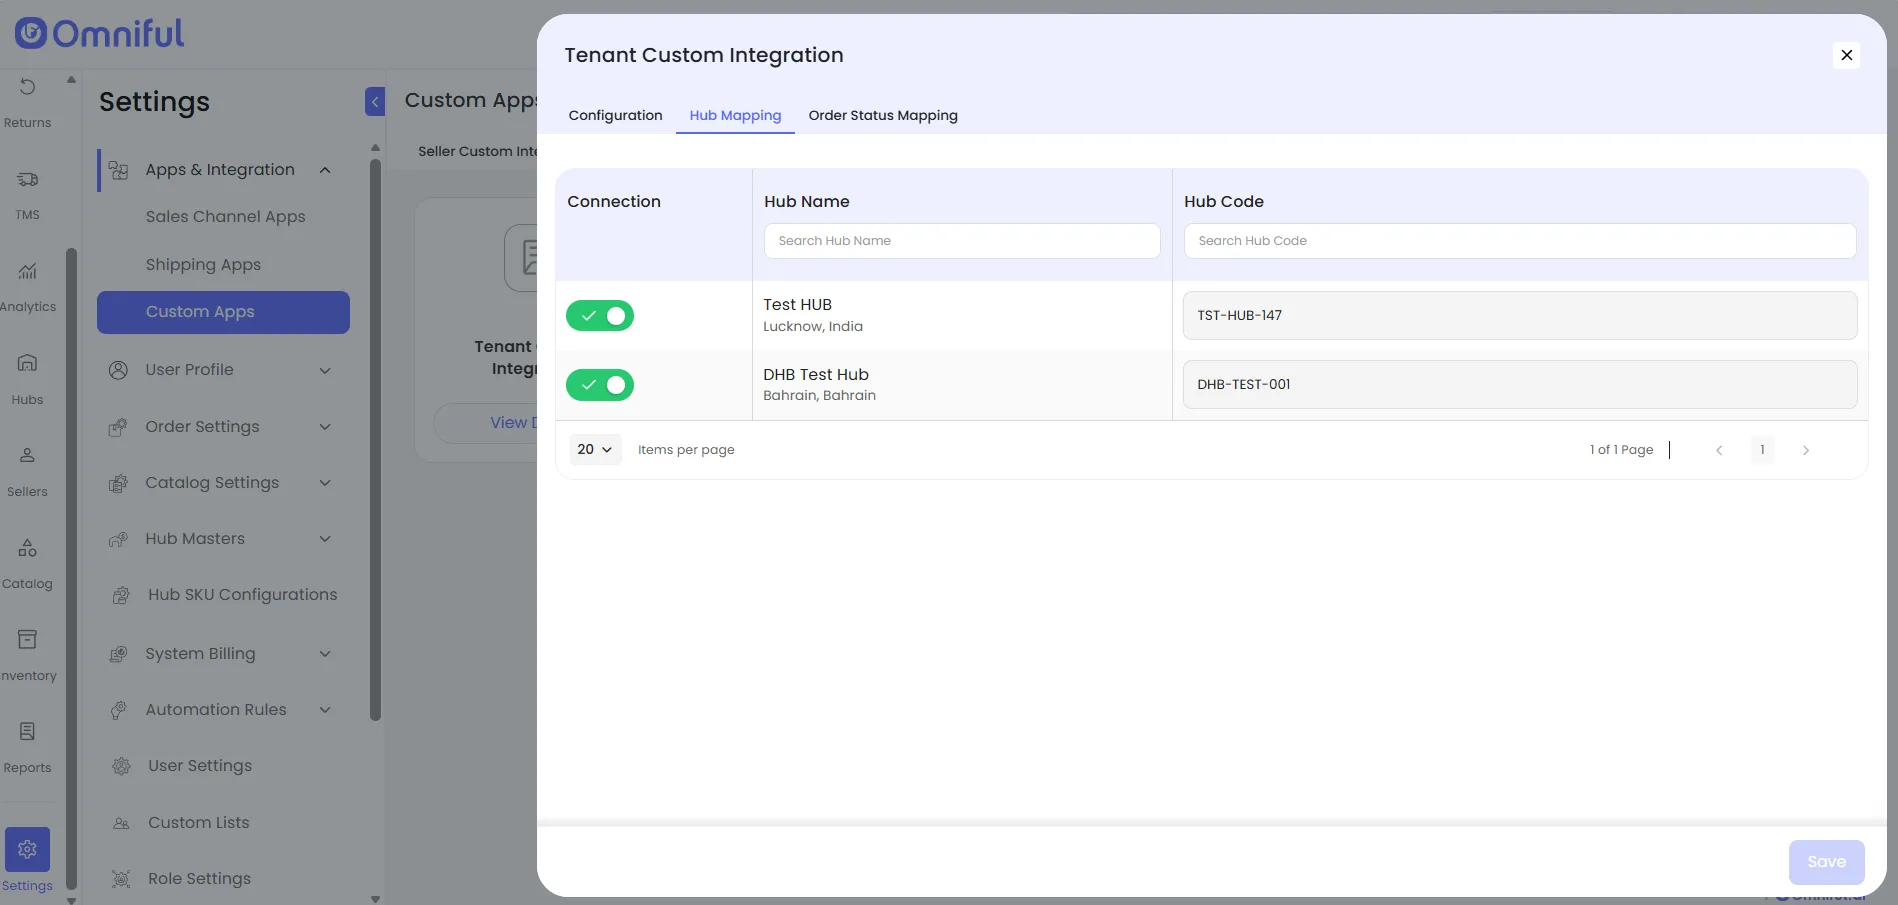
STEP 3: Hub Mapping
- Navigate to the Hub Mapping tab.
- Ensure the Connection toggle is enabled for all required hubs.
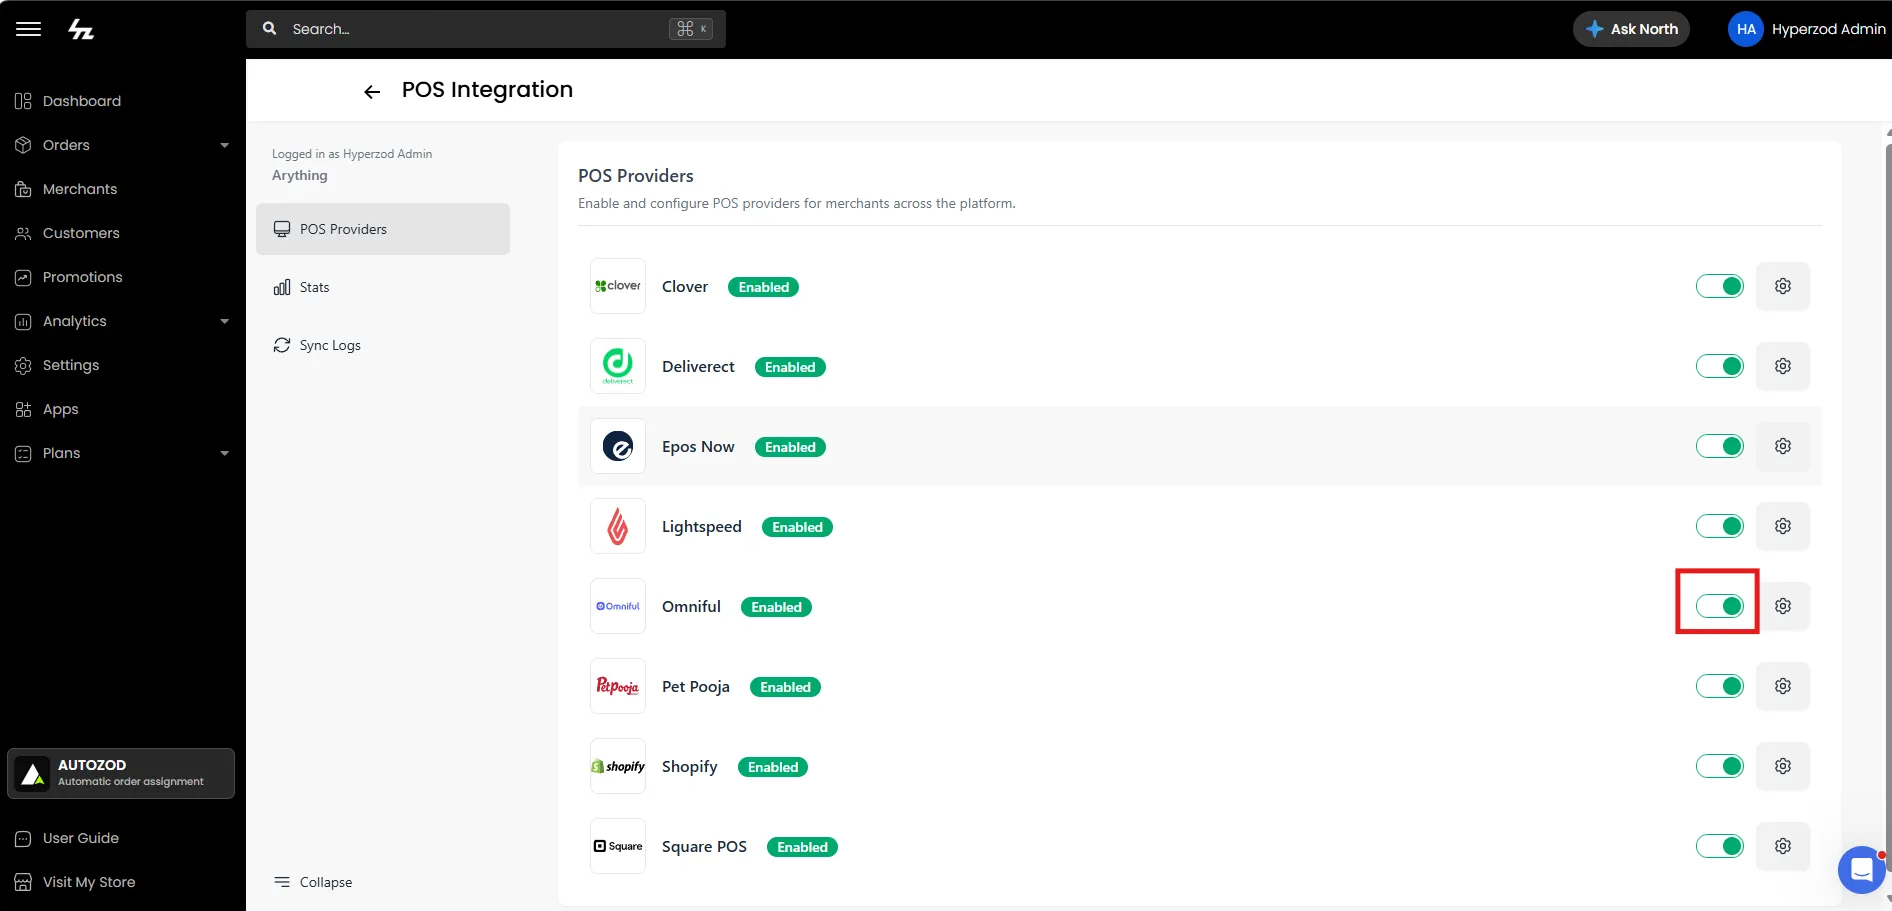
STEP 4: Activate Omniful for Merchants
Merchant Panel
STEP 1: Configure Omniful Merchant Account
- Log in to the Merchant Panel.
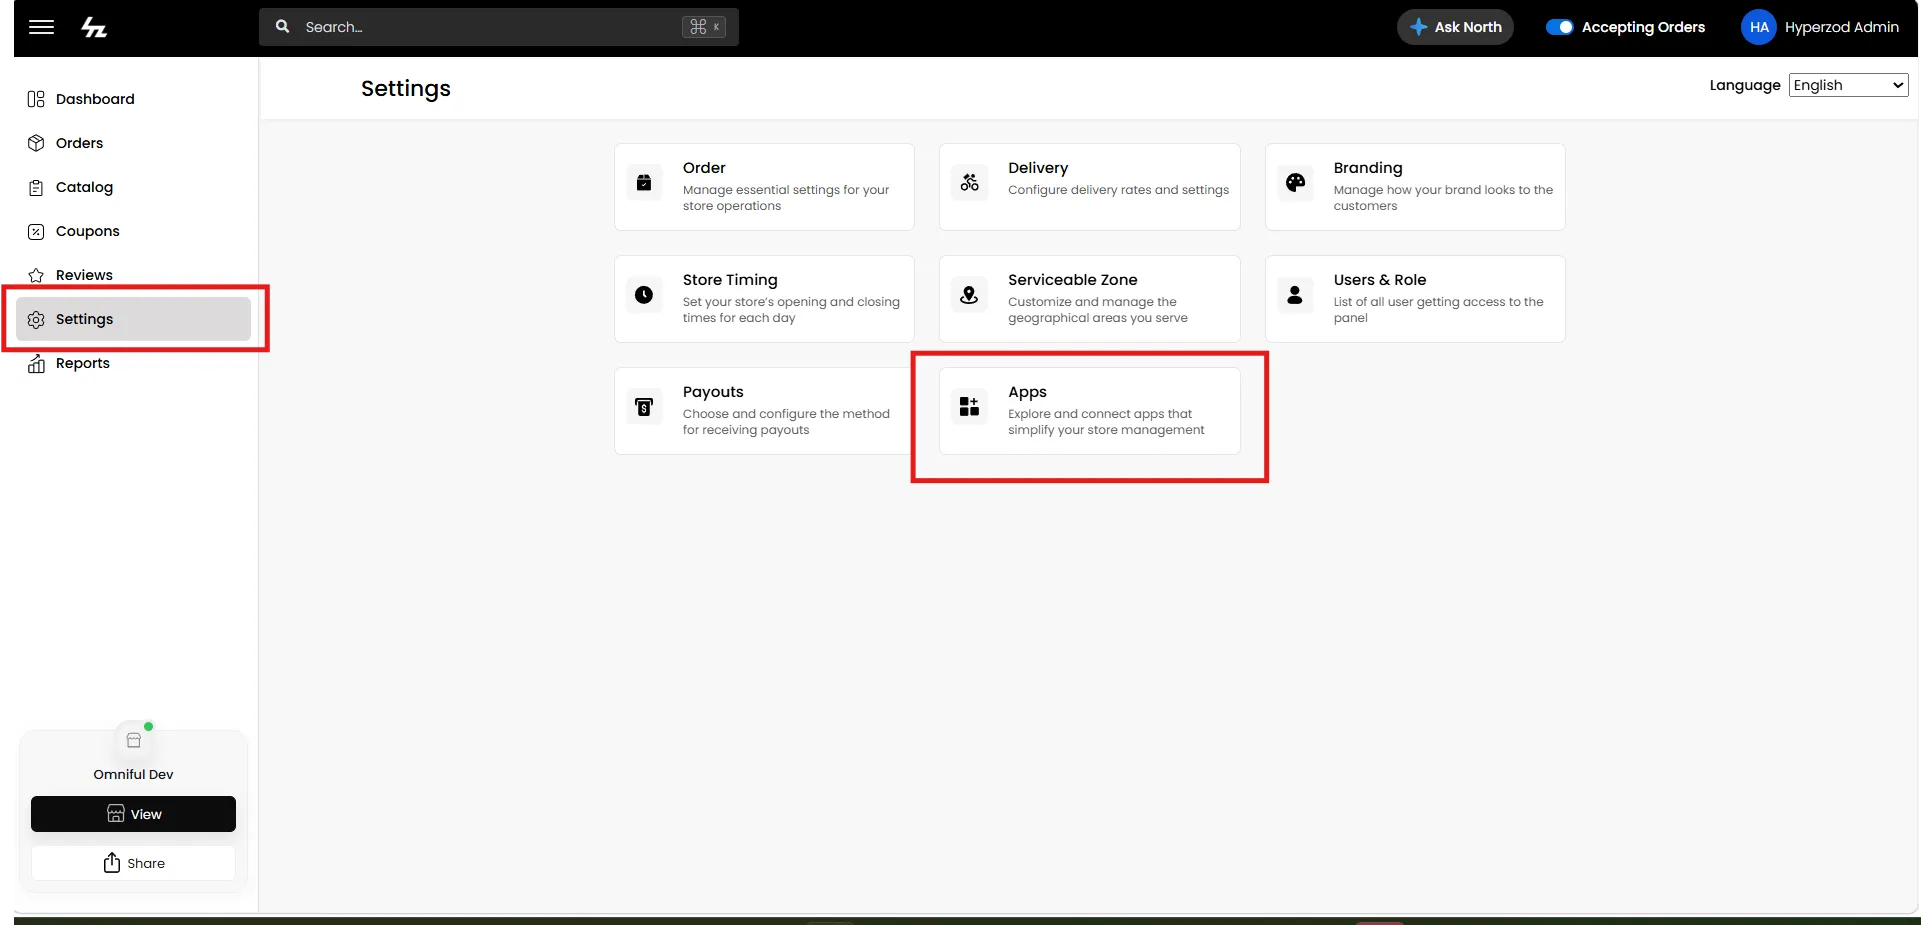
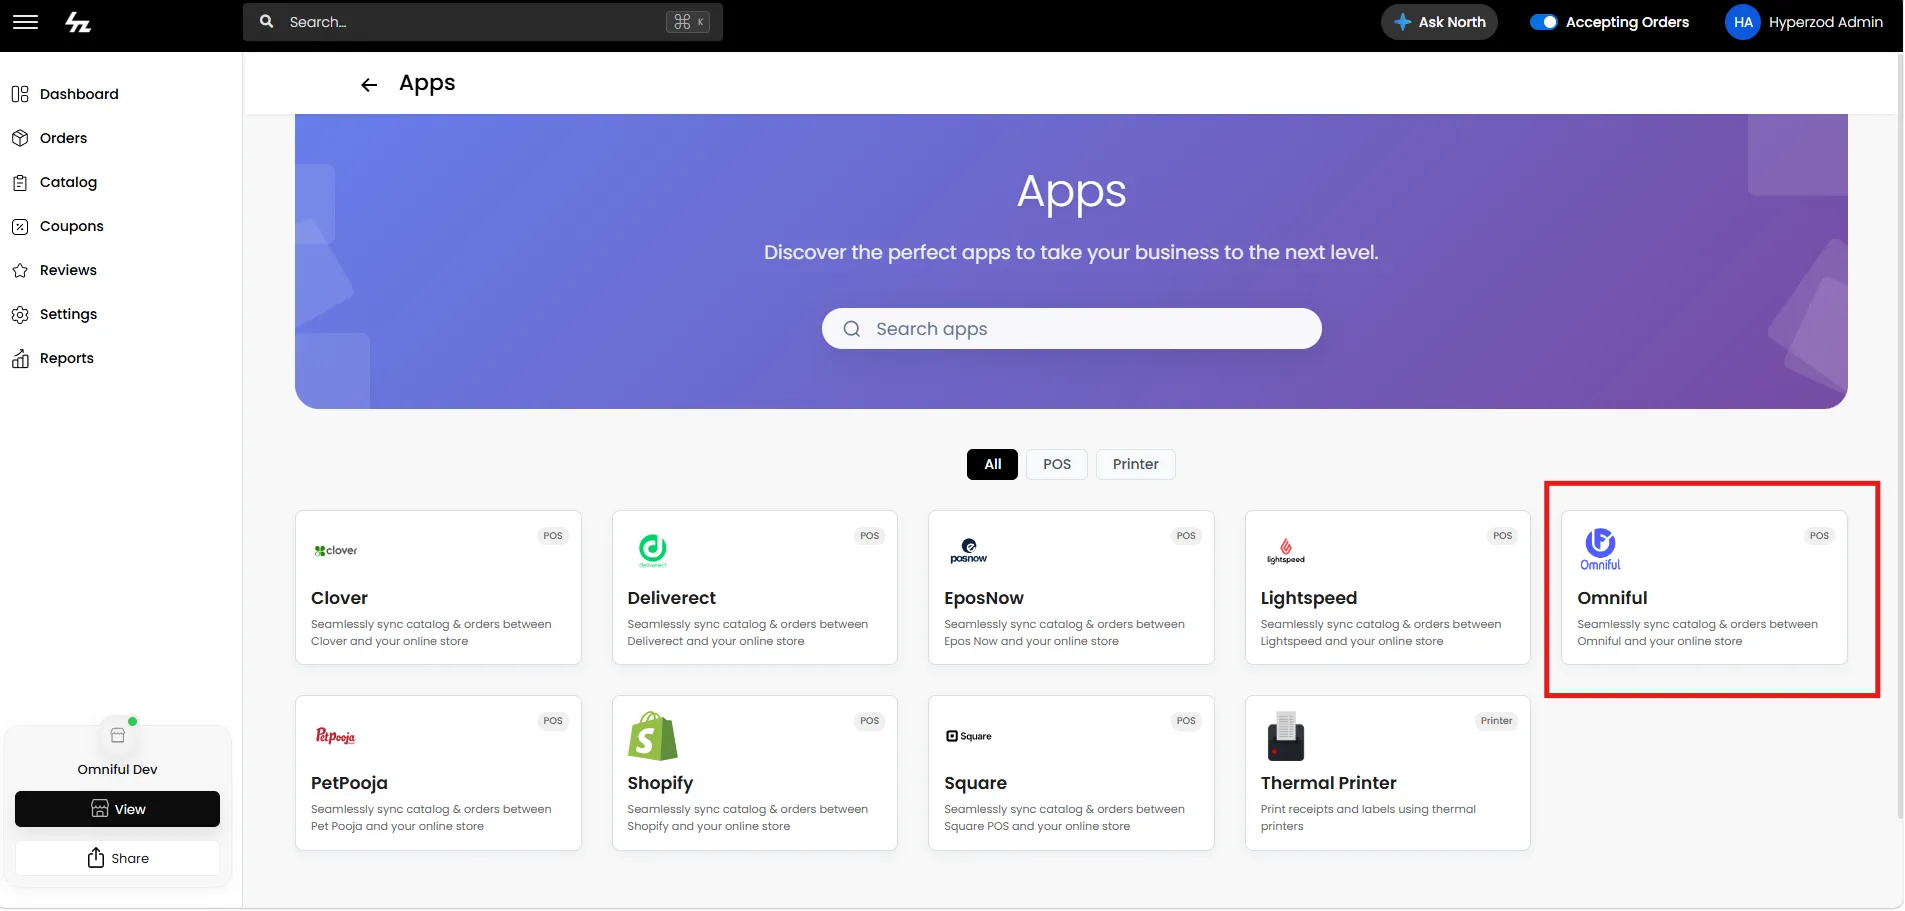
- Go to Settings → Apps → Omniful.
- Note: The Omniful app will be visible only if it has been enabled from the Admin Panel.
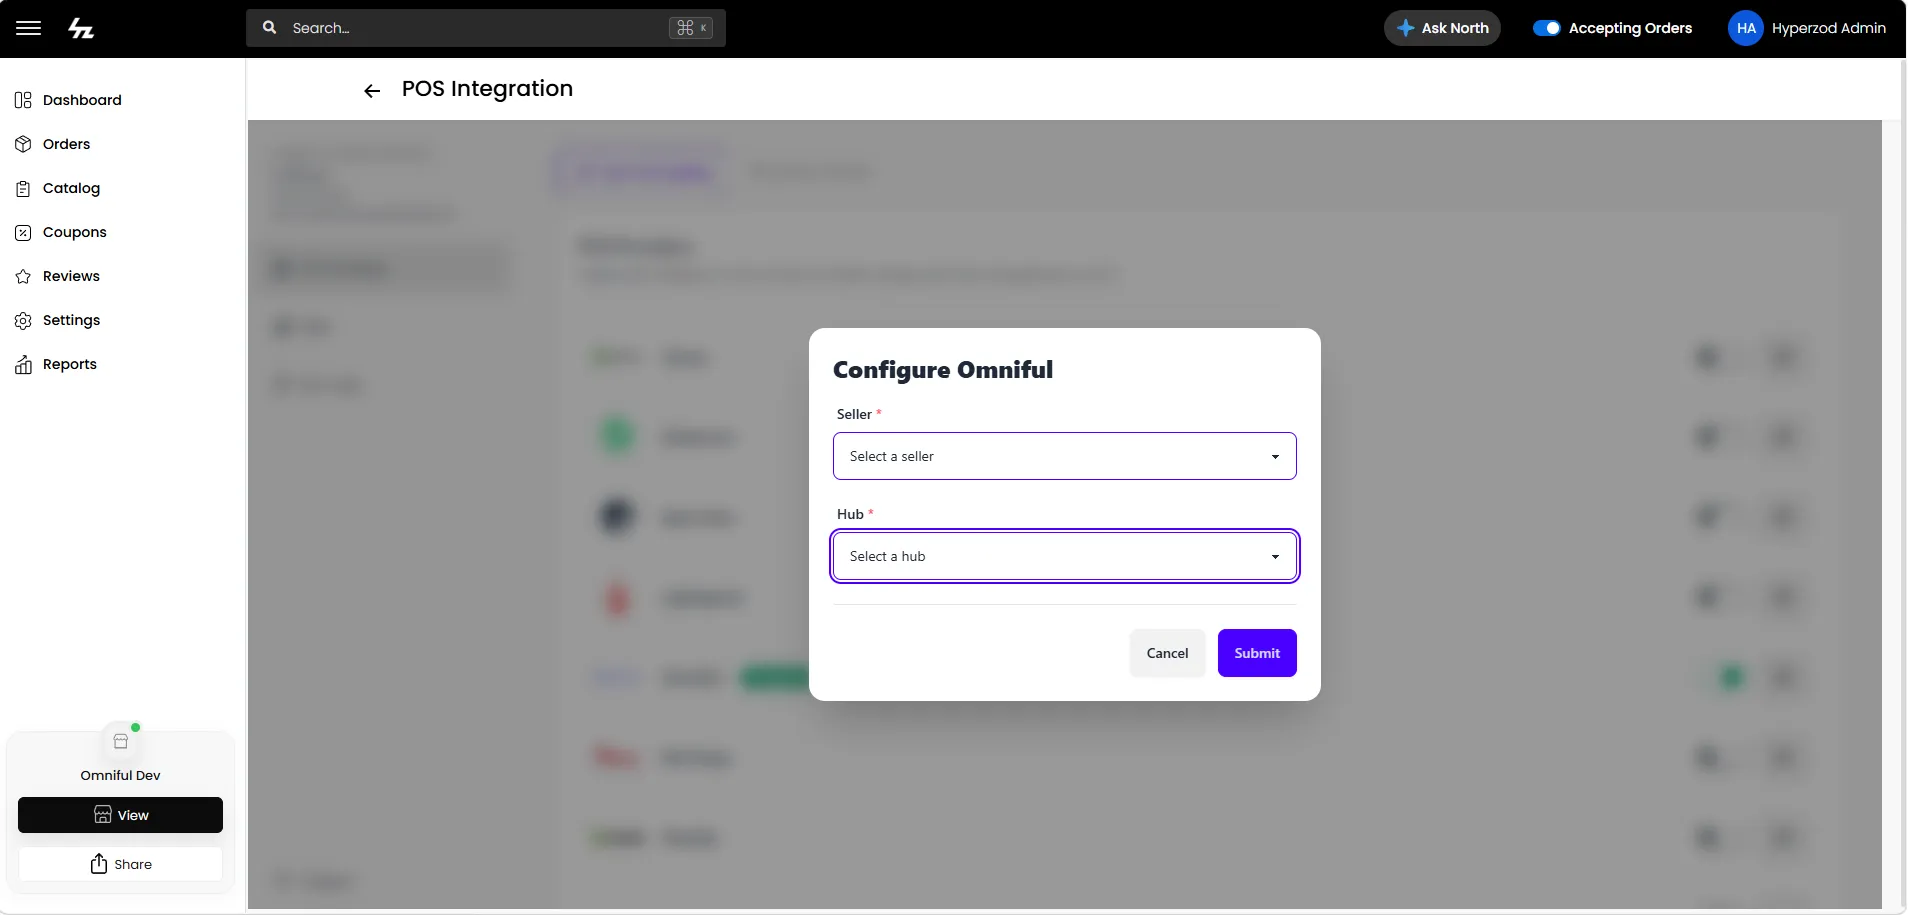
- Click Configure Omniful
- Select your Seller and Hub from the dropdowns, then click Submit
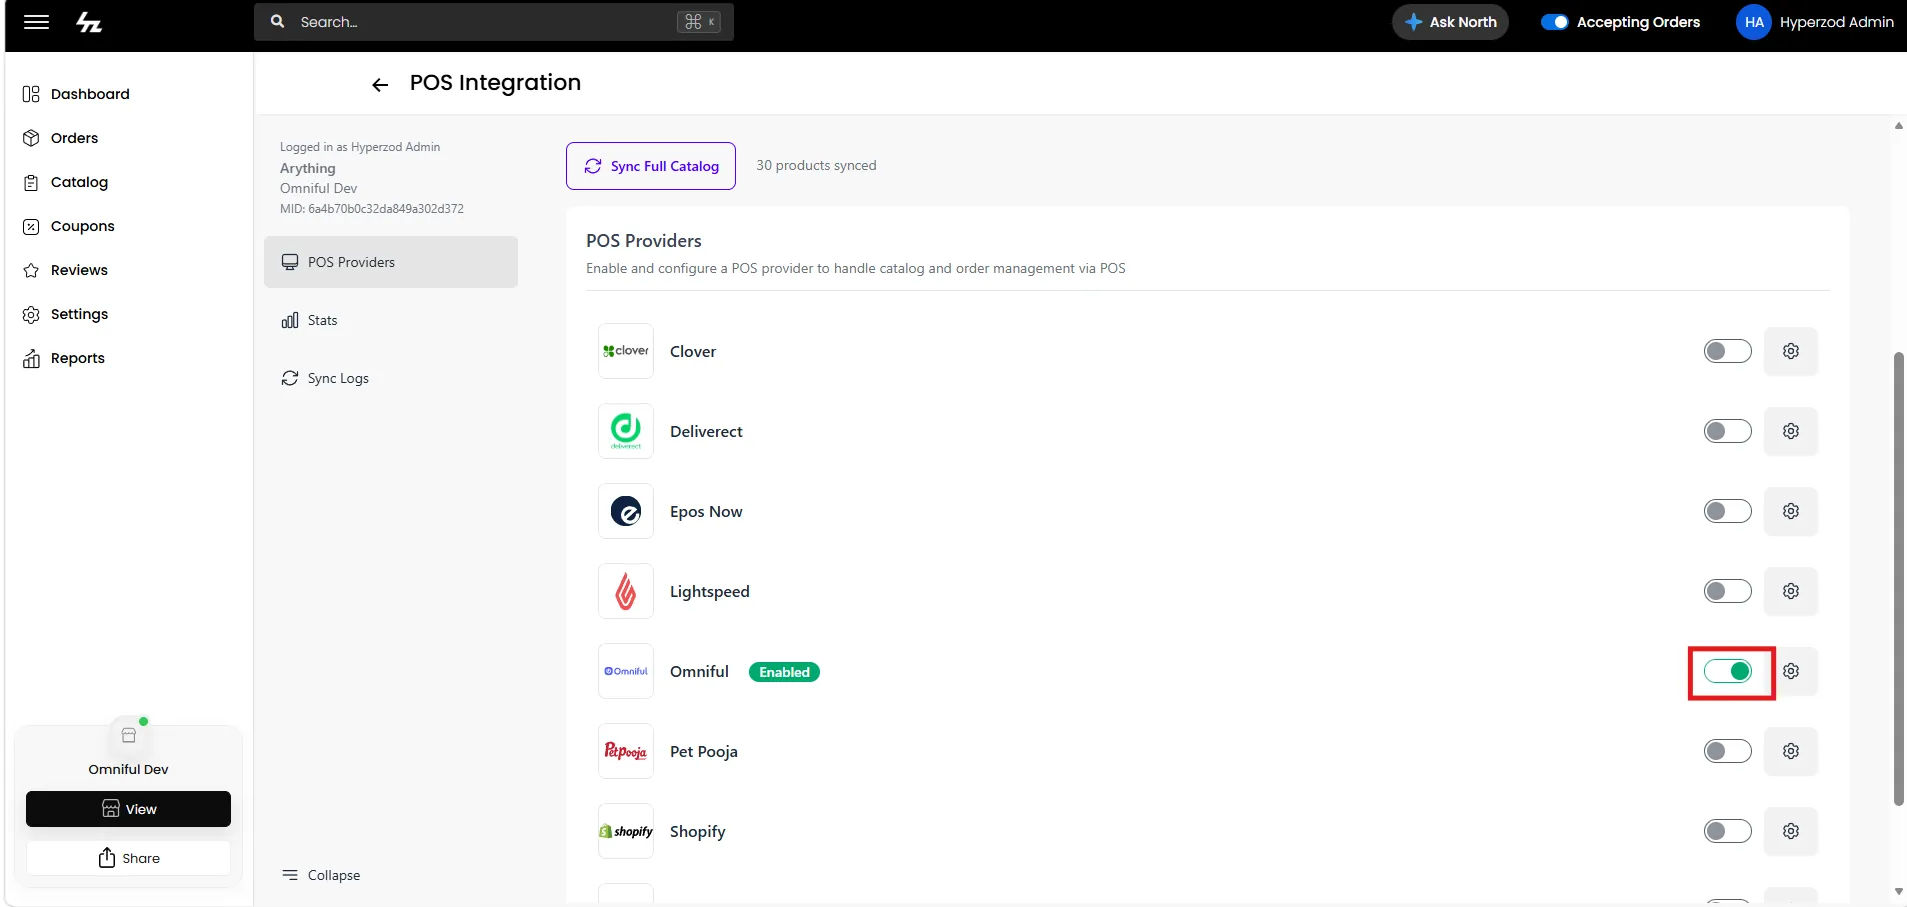
STEP 2: Activate
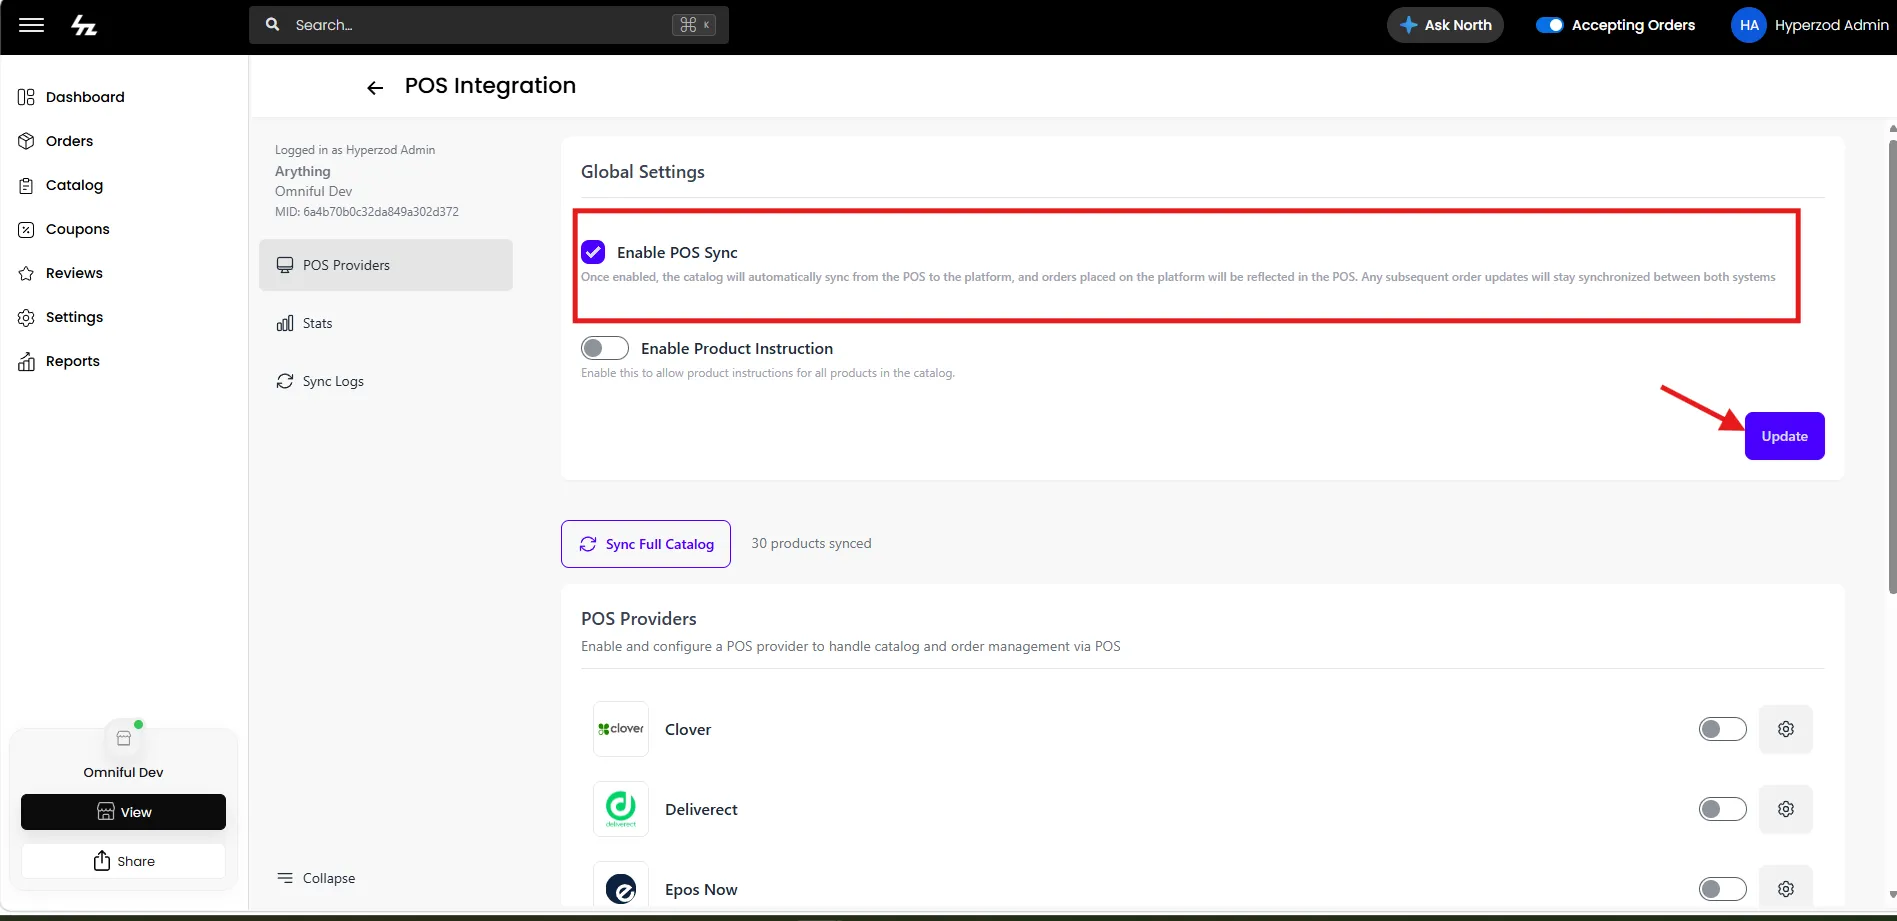
Finally, activate the Omniful and Enable POS Sync option from Global Settings.
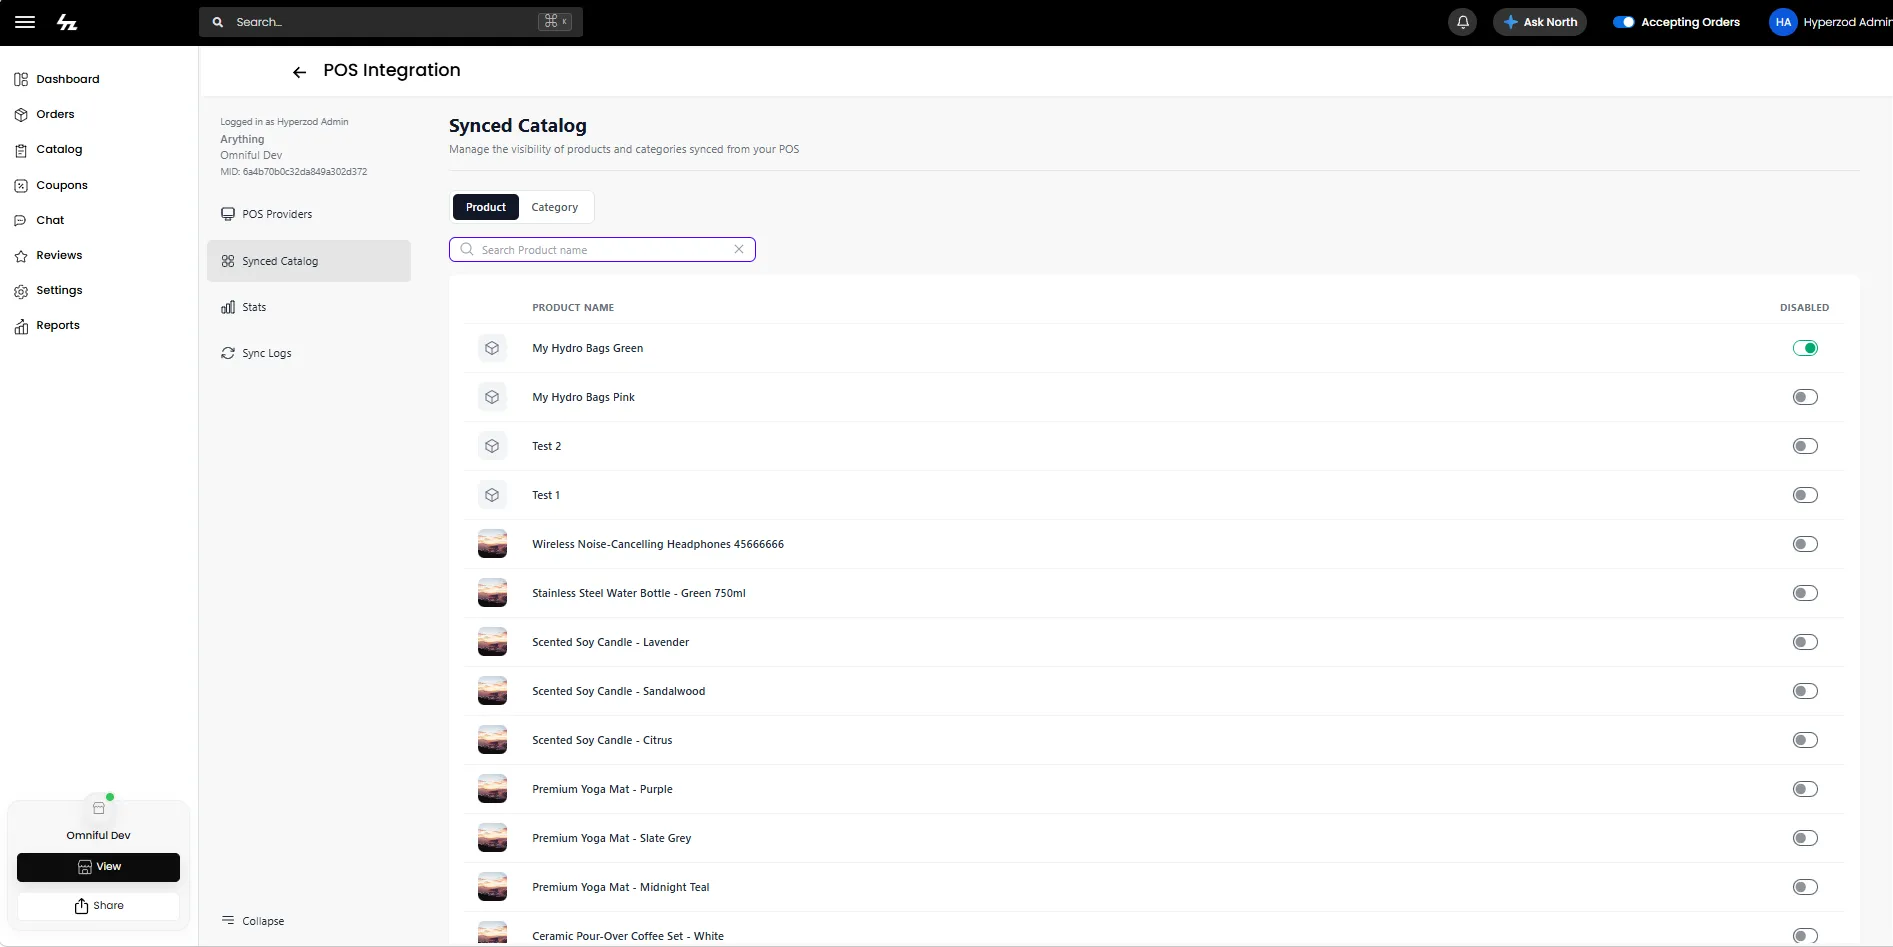
Synced Catalog
After the merchant setup is complete and the catalog is synced, you can manage the visibility of synced products and categories from the Synced Catalog page.
When a product or category is disabled, it is unpublished from your store, and future status updates from Omniful for that product or category are ignored.
When a product or category is re-enabled, it is published to your store again, and future status updates from Omniful are processed normally.